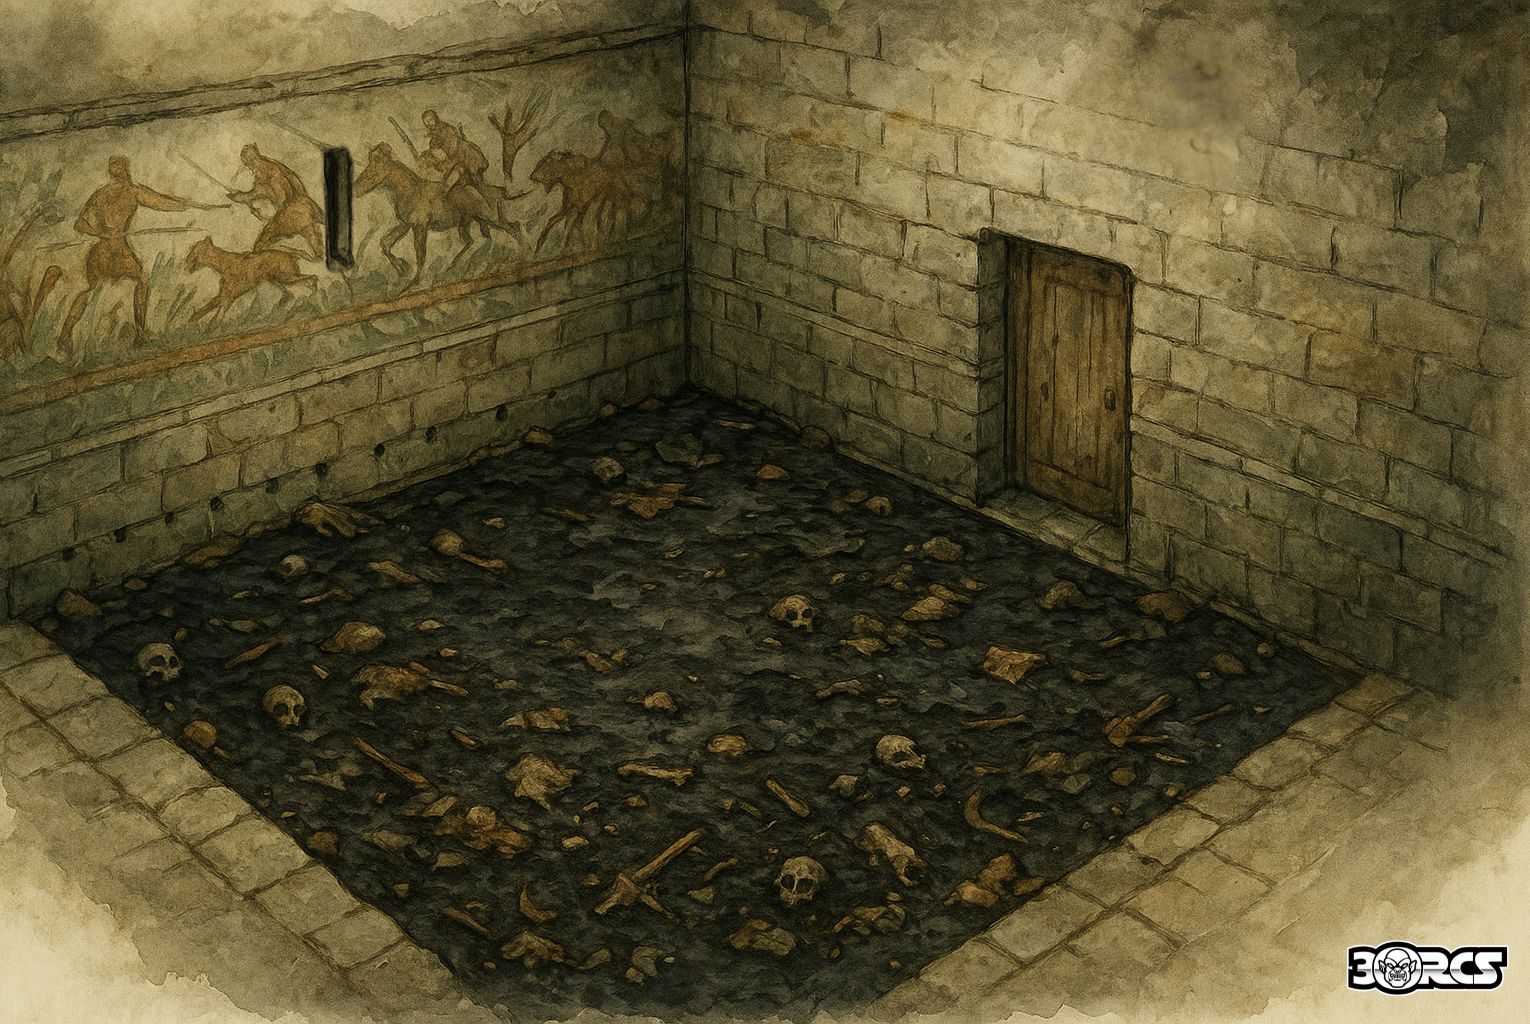
L1-3C. Scorched Barracks
What this room is/was
Once guest quarters and part of the Suel immolation defense. Howling Moon uses it rarely; the tar makes sleeping miserable.
- Occupancy when the band is home: 25% chance of 1d4 orcs (arguing about why anyone would sleep here). If present, one keeps a lazy ear to the hall; the rest wake prone at disadvantage in round 1.
Features & checks
- Tar floor (hazardous terrain).
- Movement counts as difficult terrain.
- Fast movement (more than half speed) forces a DC 10 Dex save or you stick (speed 0) until you use an action and succeed on DC 10 Str (Athletics) to wrench free (taking 1 bludgeoning from the tear).
- Fire near the floor (dropped torch, flame spell) re-ignites the tar edge: creatures within 5 ft make DC 12 Con or cough (disadvantage on Perception checks by hearing until end of next turn).
- Oil ports (north, ankle height). Investigation/Religion DC 12 identifies them as immolation outlets.
- Arrow slits (north, high). Archers in the hidden gallery can fire into this room; going prone behind wall rubble grants three-quarters cover.
- Hunt mosaic (Suel iconography). History/Religion DC 12 ties the scene to Llerg (bear motif hidden in the border) and Phaulkon (feathered vane above a hunter’s bow). No intact valuables remain, but the art confirms the temple’s Suel origin.
Suel “Burn Room” mechanic (as 3A/3B, but nastier here)
If oil is poured from the gallery or the tar is ignited:
- Spread: Oil skims over tar; creatures moving more than half speed must make Dex save DC 10 or fall prone.
- Ignite: Any open flame → Dex save DC 13, 2d6 fire (half on save) at ignition; 1d6 fire at the start of turns while in burning squares. Because of tar, flames persist 1 extra round.
- Door splash: In the doorway at ignition → Dex DC 12 or 1d4 fire and burning droplets (action to douse).
Tactics & response
- If occupied: Orcs kick the least-sticky corner mats into a low berm, shove intruders toward the stickiest patches, and bellow: “Found you! Time to die!” / “Bleed! Bleed and die!”
- Alarm path: If no gong yet, one orc sprints to Room 3 (Ready Room); fighting here for 2+ rounds brings 2 more orcs from Room 3 next round (d6 → 3–6).
Treasure
None of value. Hinges and fittings long stripped; anything metal left in the tar is ruined. Careful prying (10 minutes) might free bone dice (2 sp) fused to the edge.

Map notes
- Door on the south opens to the main red-tiled corridor.
- North wall backs the hidden gallery that feeds the burn ports and arrow slits (not accessible from here).
Use the tar to create tense movement choices; clever players may bait Blackthorn into the sticky zone, then spark the edge while allies hold the door.
Howling Moon Warband (when not out raiding)
- Headcount on-site (typical rest cycle): 2d4 orcs per room (3A–3C 1 bugbear lounging in darkness (25% per room, 75% at night).
- Shift pattern: 3 short watches (about 3 hours each). One orc “half-awake” by the door; others asleep or dicing.
- Gear to hand: javelins (2 each), axes, battered shields stacked near door; rot-spirit jug under the table; bone dice.
- Discipline cues: watchword pair—Call: “Black?” / Response: “Thorn.” Failure triggers a shove-and-stab.
- Alarm path: nearest orc sprints to Room 3 (Ready Room); second bangs shield on stone; third tries to bait intruders into the burn room trap.
- Fighting style: shove to doorway, swarm with advantage if two or more can dog-pile; bugbear flanks from darkness.
- Morale: steady while they think reinforcements are a shout away; if fire/oil ignites, first round at disadvantage, then reckless charge.


Comments