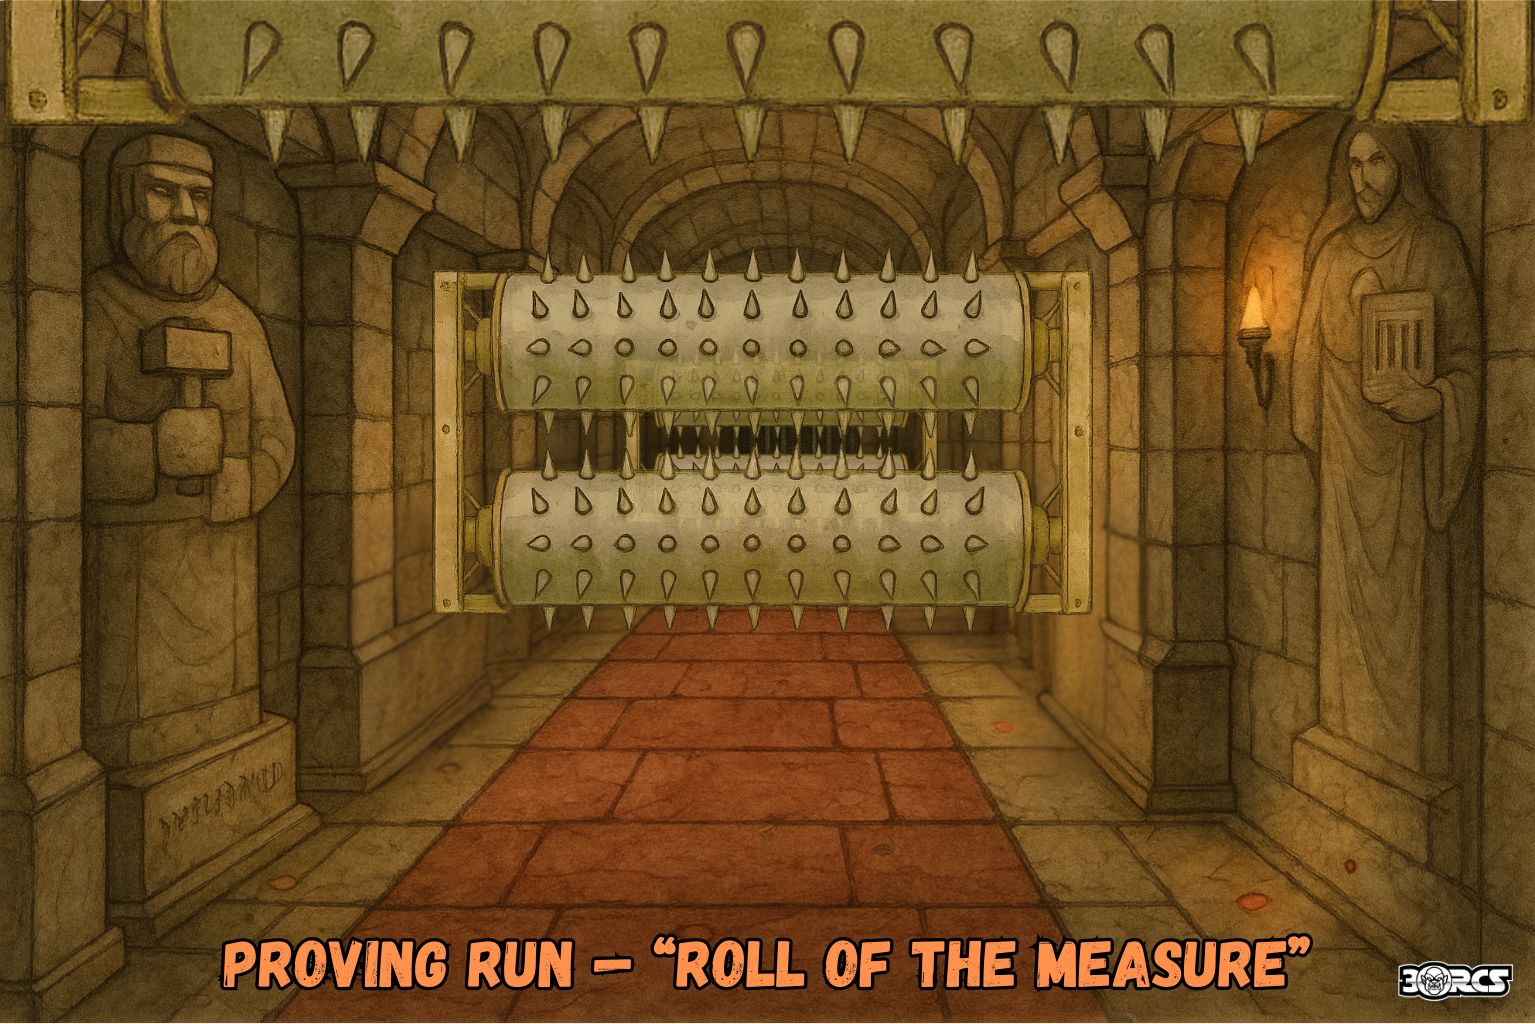
L2-17. Proving Run — Roll of the Measure
How it works (clean, table-fast)
Each gate can be stowed (retracted/stopped) for 3 rounds by pressing the two opposing plates tied to that gate simultaneously on a six-count. With only four alcoves total, control is:
- Gate A (1st rollers) — Entry jamb plates at the corridor mouth
Two small brass plates (hip-high) on the left/right jambs where you step in, etched with Fortubo (brace) and Jascar (keep). - Stow: Two creatures (or a creature + Mage Hand) press both plates while counting to six → Gate A retracts 3 rounds.
- Clue (thin script): “Brace and keep.”
- Gate B (2nd rollers) — Alcove Pair 1 (between A & B)
North statue: Wee Jas (judge’s palm raised). South statue: Lendor (six bars). - Stow: Press both plates together on a six-count → Gate B retracts 3 rounds.
- Clue: “Witness and count.”
- Gate C (3rd rollers) — Alcove Pair 2 (between B & C)
North statue: Lendor (Measure). South statue: Pyremius (pyre-tongue, soot-stained). - Correct stow: Do NOT press Pyremius. Press Lendor and the small floor witness pip (a ruby stud in the seam just before Gate C, Perception 12 or any careful scan) simultaneously on a six-count → Gate C retracts 3 rounds.
- Mispress (trap): Pressing Pyremius at any time accelerates Gate C until end of next round; saves vs. Gate C this round are at disadvantage and Attention +1.
- Clue: “Measure, not flame.” The floor pip glints on the six-beat.
Moving through active rollers
- Entering an active gate’s space → DEX save DC 14. Fail: 13 (3d6+1) slashing/piercing, knocked prone, pushed 10 ft back. Success: Half, no knockdown.
- Start of turn while prone in an active gate: 7 (2d6) slashing.
- Stow duration: 3 rounds; audible six-beat counts it down.
- Wedges: A brace-nail keeps one stowed gate off for 10 minutes. True-Square grants advantage to spot the floor pip at Gate C.
The portcullis
- Open condition: While Gate C is currently stowed, a character at Alcove Pair 2 (north, Wee Jas lintel pip) speaks a respectful line on a six-count and presses the tiny ruby pip on the final beat → the portcullis rises for 1 minute.
- Bypass reward: Touch a Stonebond Token (from L2-11b) to that same pip on a six-count to raise it without stowing Gate C.
Secret door — 2nd SOUTH alcove → L2-16b
- Look: Full-length Lendor mural (judging pose) with hairline seam.
- Open: Tap the six bars top→bottom on a six-count, then touch the corner ruby → panel swings inward to a 5-ft-wide, 10-ft slip that leads to the backside of the Mirror Anteroom secret.
Clues & readability
- Verbs beneath plates: Brace/Keep (entry), Witness/Count (Alcove 1), Measure/Not-Flame (Alcove 2).
- The floor pip before Gate C winks on the beat; incense smoke drifts toward it.
- The two-hand nature of the plates encourages teamwork or Mage Hand/pole tricks.
Attention & patrols
- Each failed save or loud banging → +1 Attention.
- At Attention ≥ 3, a Ruby Custodian with 2 Ruby Zombies enters from the west (from L2-10) in 1d4 rounds, trying to pin intruders against Gate A.
Boxed outcomes
- Stowing a gate: One… two… three… four… five… six—gears bite and the rollers pull back, leaving the lane quiet for a handful of heartbeats.
- Taking the rollers: Iron teeth rake across the red plates; you’re scooped, slammed, and shoved backward in a spray of sparks.
- Portcullis opens: Ruby seam-lights gutter; a deep latch thunks. The portcullis lifts in a measured rise.

Layout
- Gate A (1st rollers) at ~15 ft.
- Alcove Pair 1 (N & S statues) between Gate A and Gate B.
- Gate B (2nd rollers) at ~35 ft.
- Alcove Pair 2 (N & S statues) between Gate B and Gate C.
- Gate C (3rd rollers) at ~55 ft.
- Portcullis sits immediately beyond Gate C, leading to a 30-ft-diam. round chamber.
- Secret link: The 2nd SOUTH alcove hides the mural-door that connects to L2-16b (backside).
Layout notes
- Length: ~70 ft.
- Pairs: Three “gates” of rollers at 15 ft, 35 ft, 55 ft from the start.
- Alcoves: After each gate, matched alcoves (N & S) sit 5 ft beyond the rollers.
- End: A wide portcullis (15 ft) into a 30-ft-diam. round room (to be keyed later).


Comments