
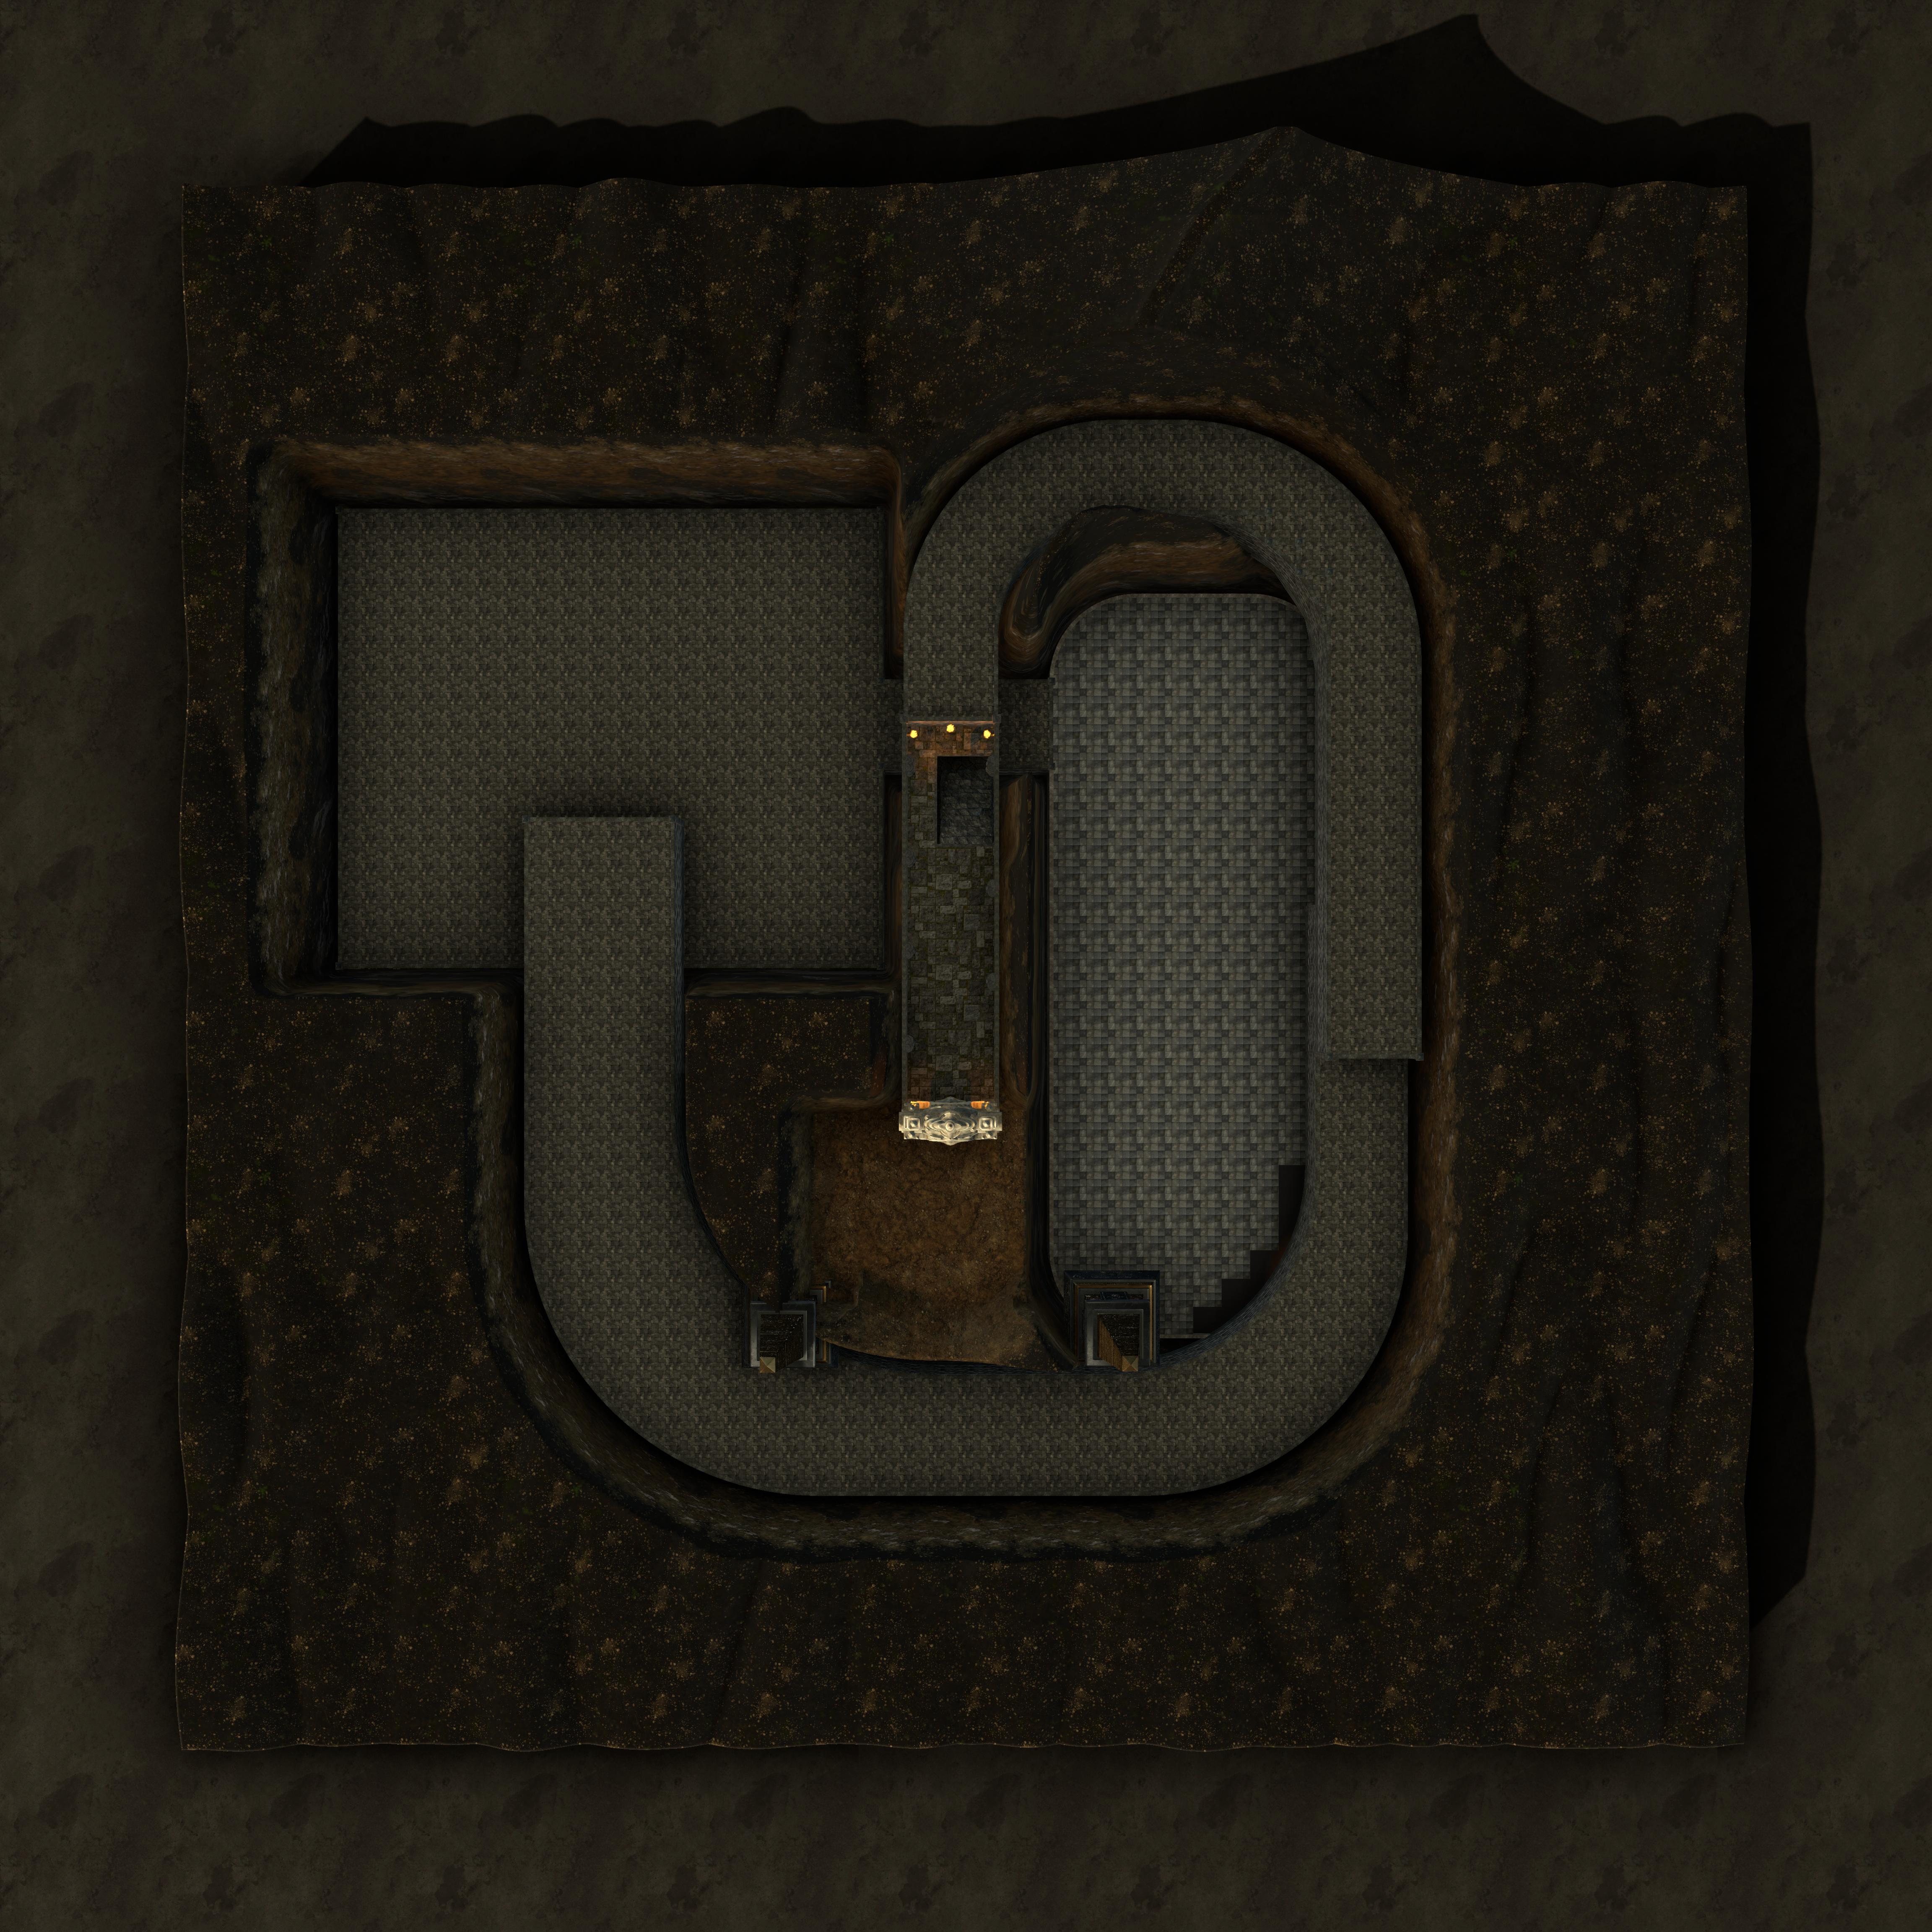
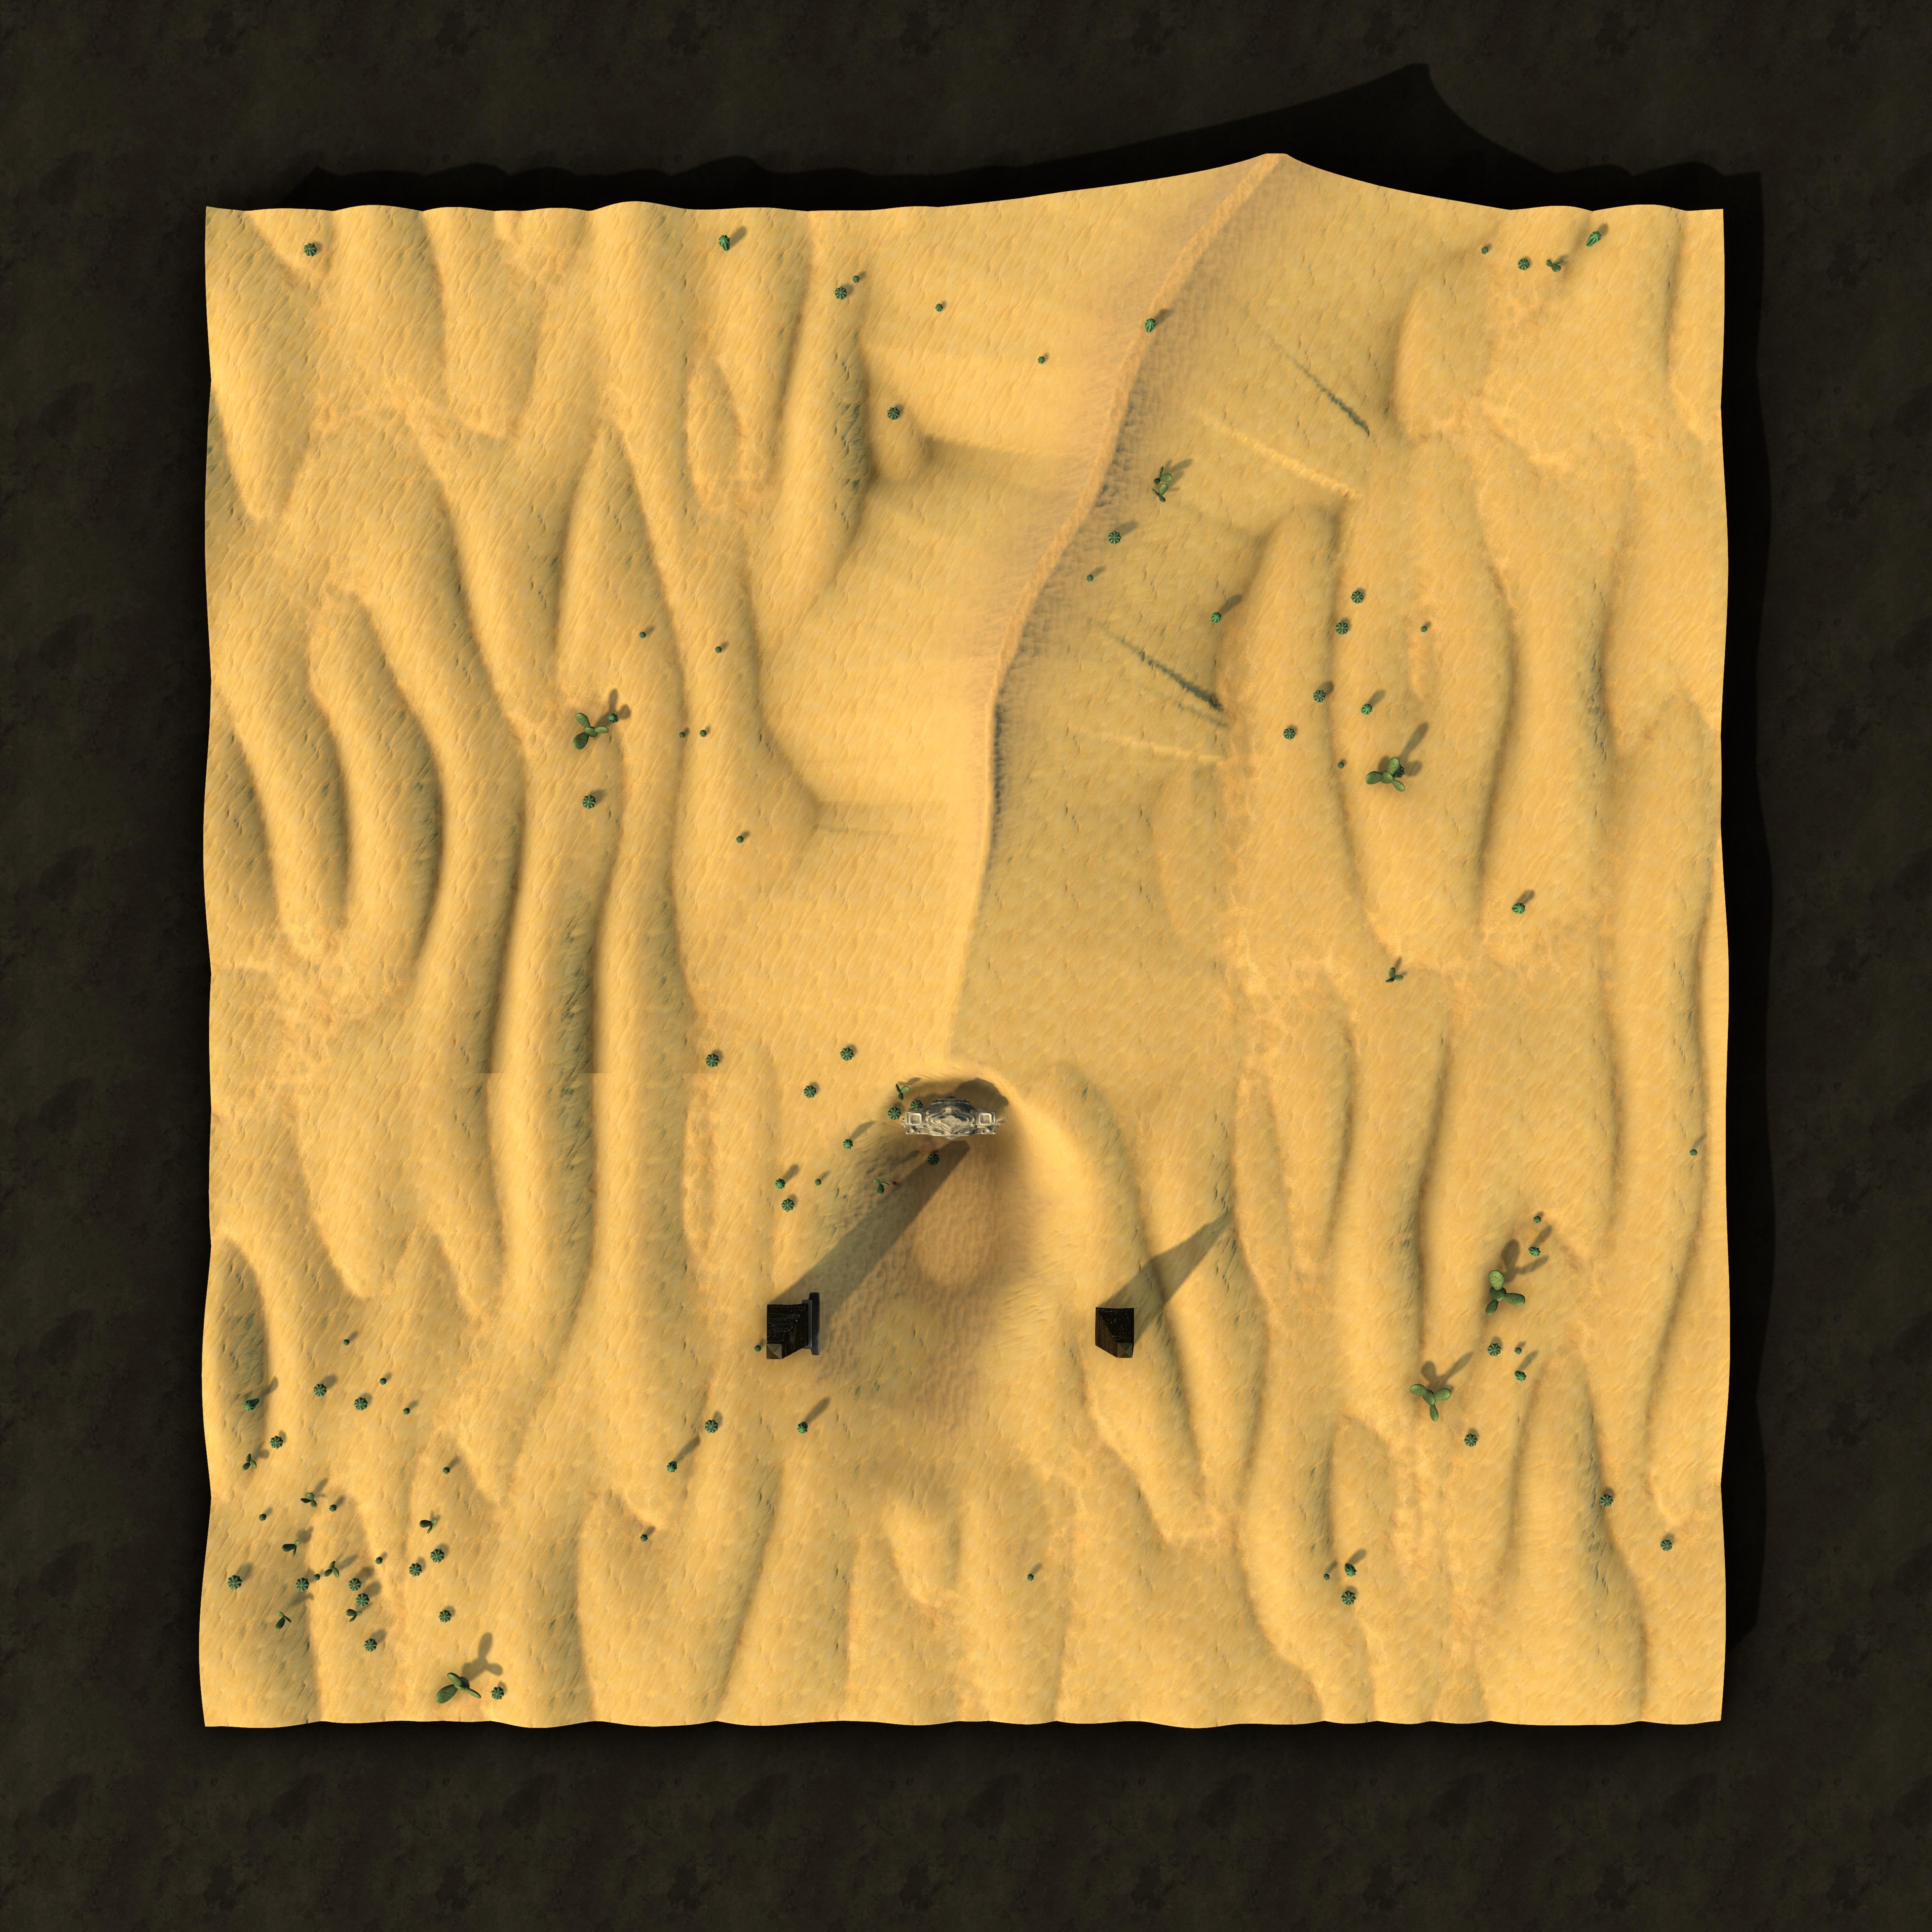
Tomb of Barrax
Barrax the Sage was a mathemetician and scholar in the nineteenth century before the common era began. He prised out some truly esoteric mathematical concepts, and is and always will be known as the father of applied engineering.
He was mummified and buried with full accolades, and all of the honors due to a sage during the Age of Enlightenment. But, like all things in the desert, his grave was eventually covered with sand, and lost to the deeps of time.
1 - Entrance
A massive block of sandstone has been carved into the entrance to this tomb. Geometric patterns and serpentine glyphs all combine to make a death's door that is imposing and respectful all at the same time. It was sealed shut with a massive rock, but the recent earthquake that revealed the entrance also crumbled the ancient sandstone plug. With just a few hours of work, you can clear away the rubble and enter the tomb.
GM Note: Gameplay
The characters may opt to not explore the tomb. If this happens, a small earthquake will tremble throughout the area, crumbling the plug-stone further, exposing an entryway into the tomb with a rush of air that sounds like a sigh. If this does not entice them, do not force them. There is something to be said for not wanting to disturb a tomb; they are welcome to leave.
2 - Entrance Hall
Read the following aloud
This hall is nine feet high, ten feet wide, and cut right out of the desert sandstone. It proceeds into the hillside for sixty feet, to descend a set of rock hewn steps at the end.
Halfway down the hall, there is a false floor and a pit trap that can be discovered with a DC12 Intelligence(Investigation) check. If a character steps on this part of the floor, they can make a DC15 Dexterity Saving Throw, or fall twenty feet for 2d6 points of damage.
3 - Stairs
This set of rock-hewn stairs leads to the next level of the tomb complex.
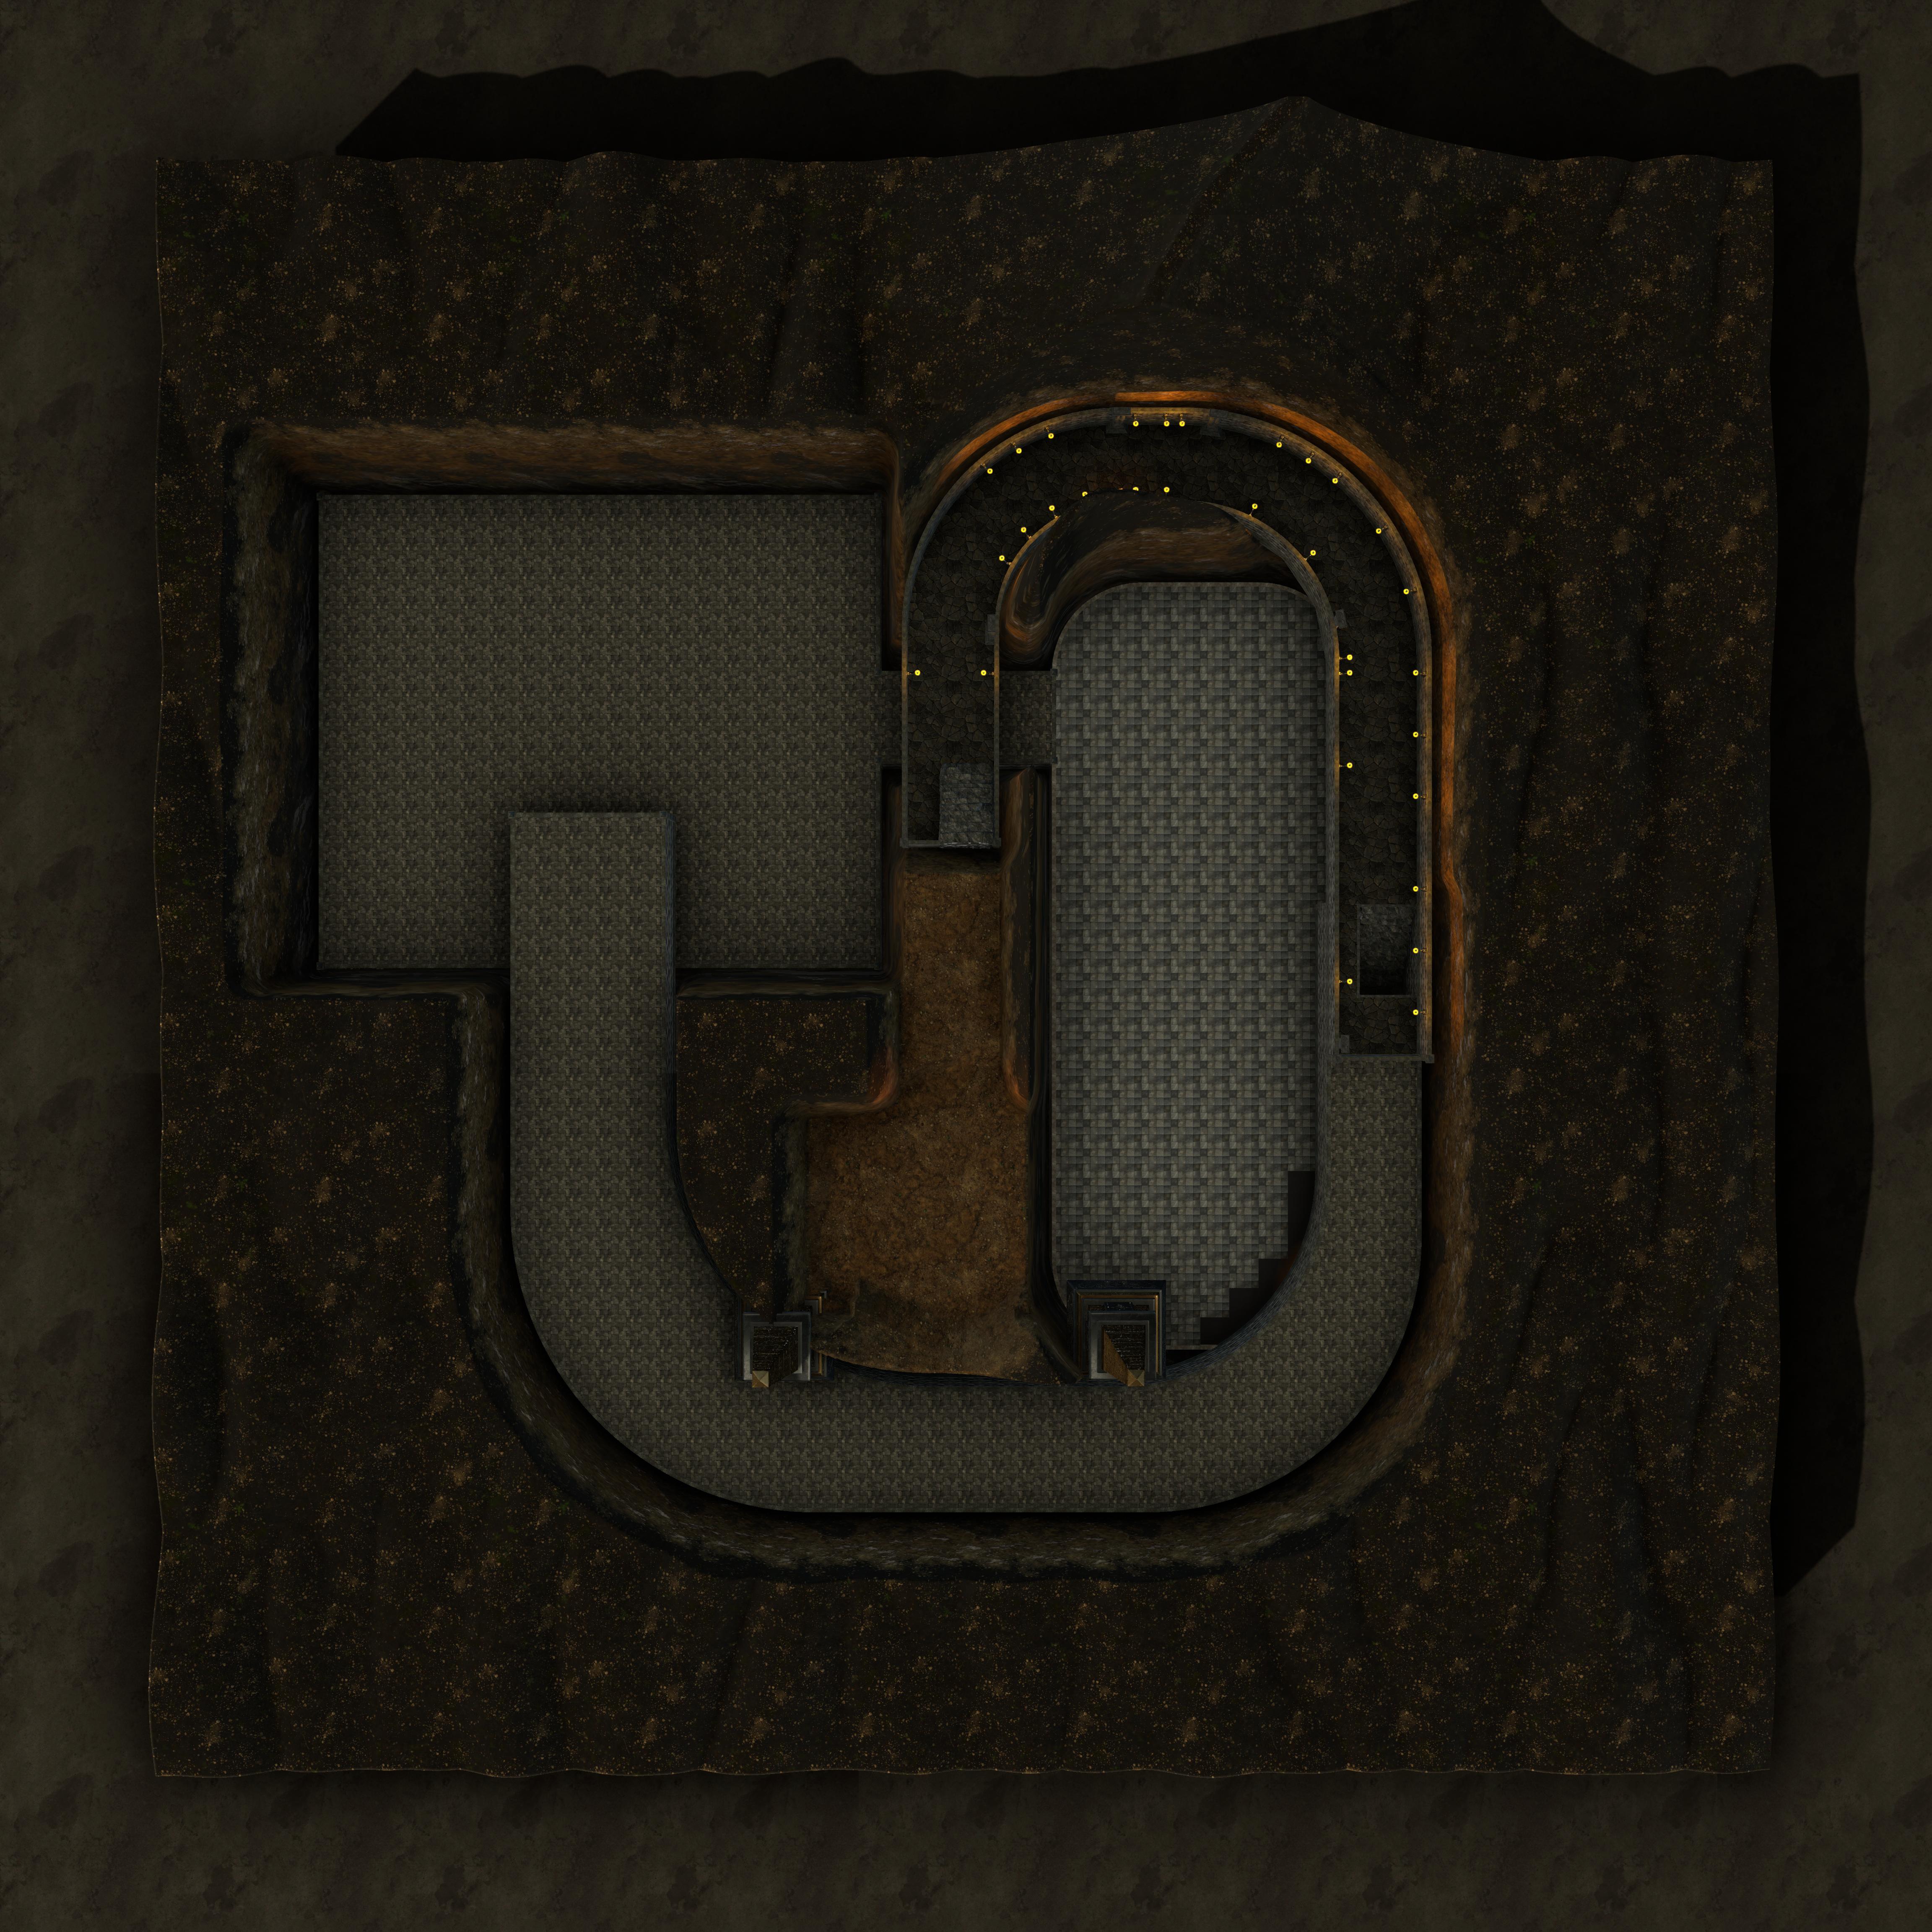
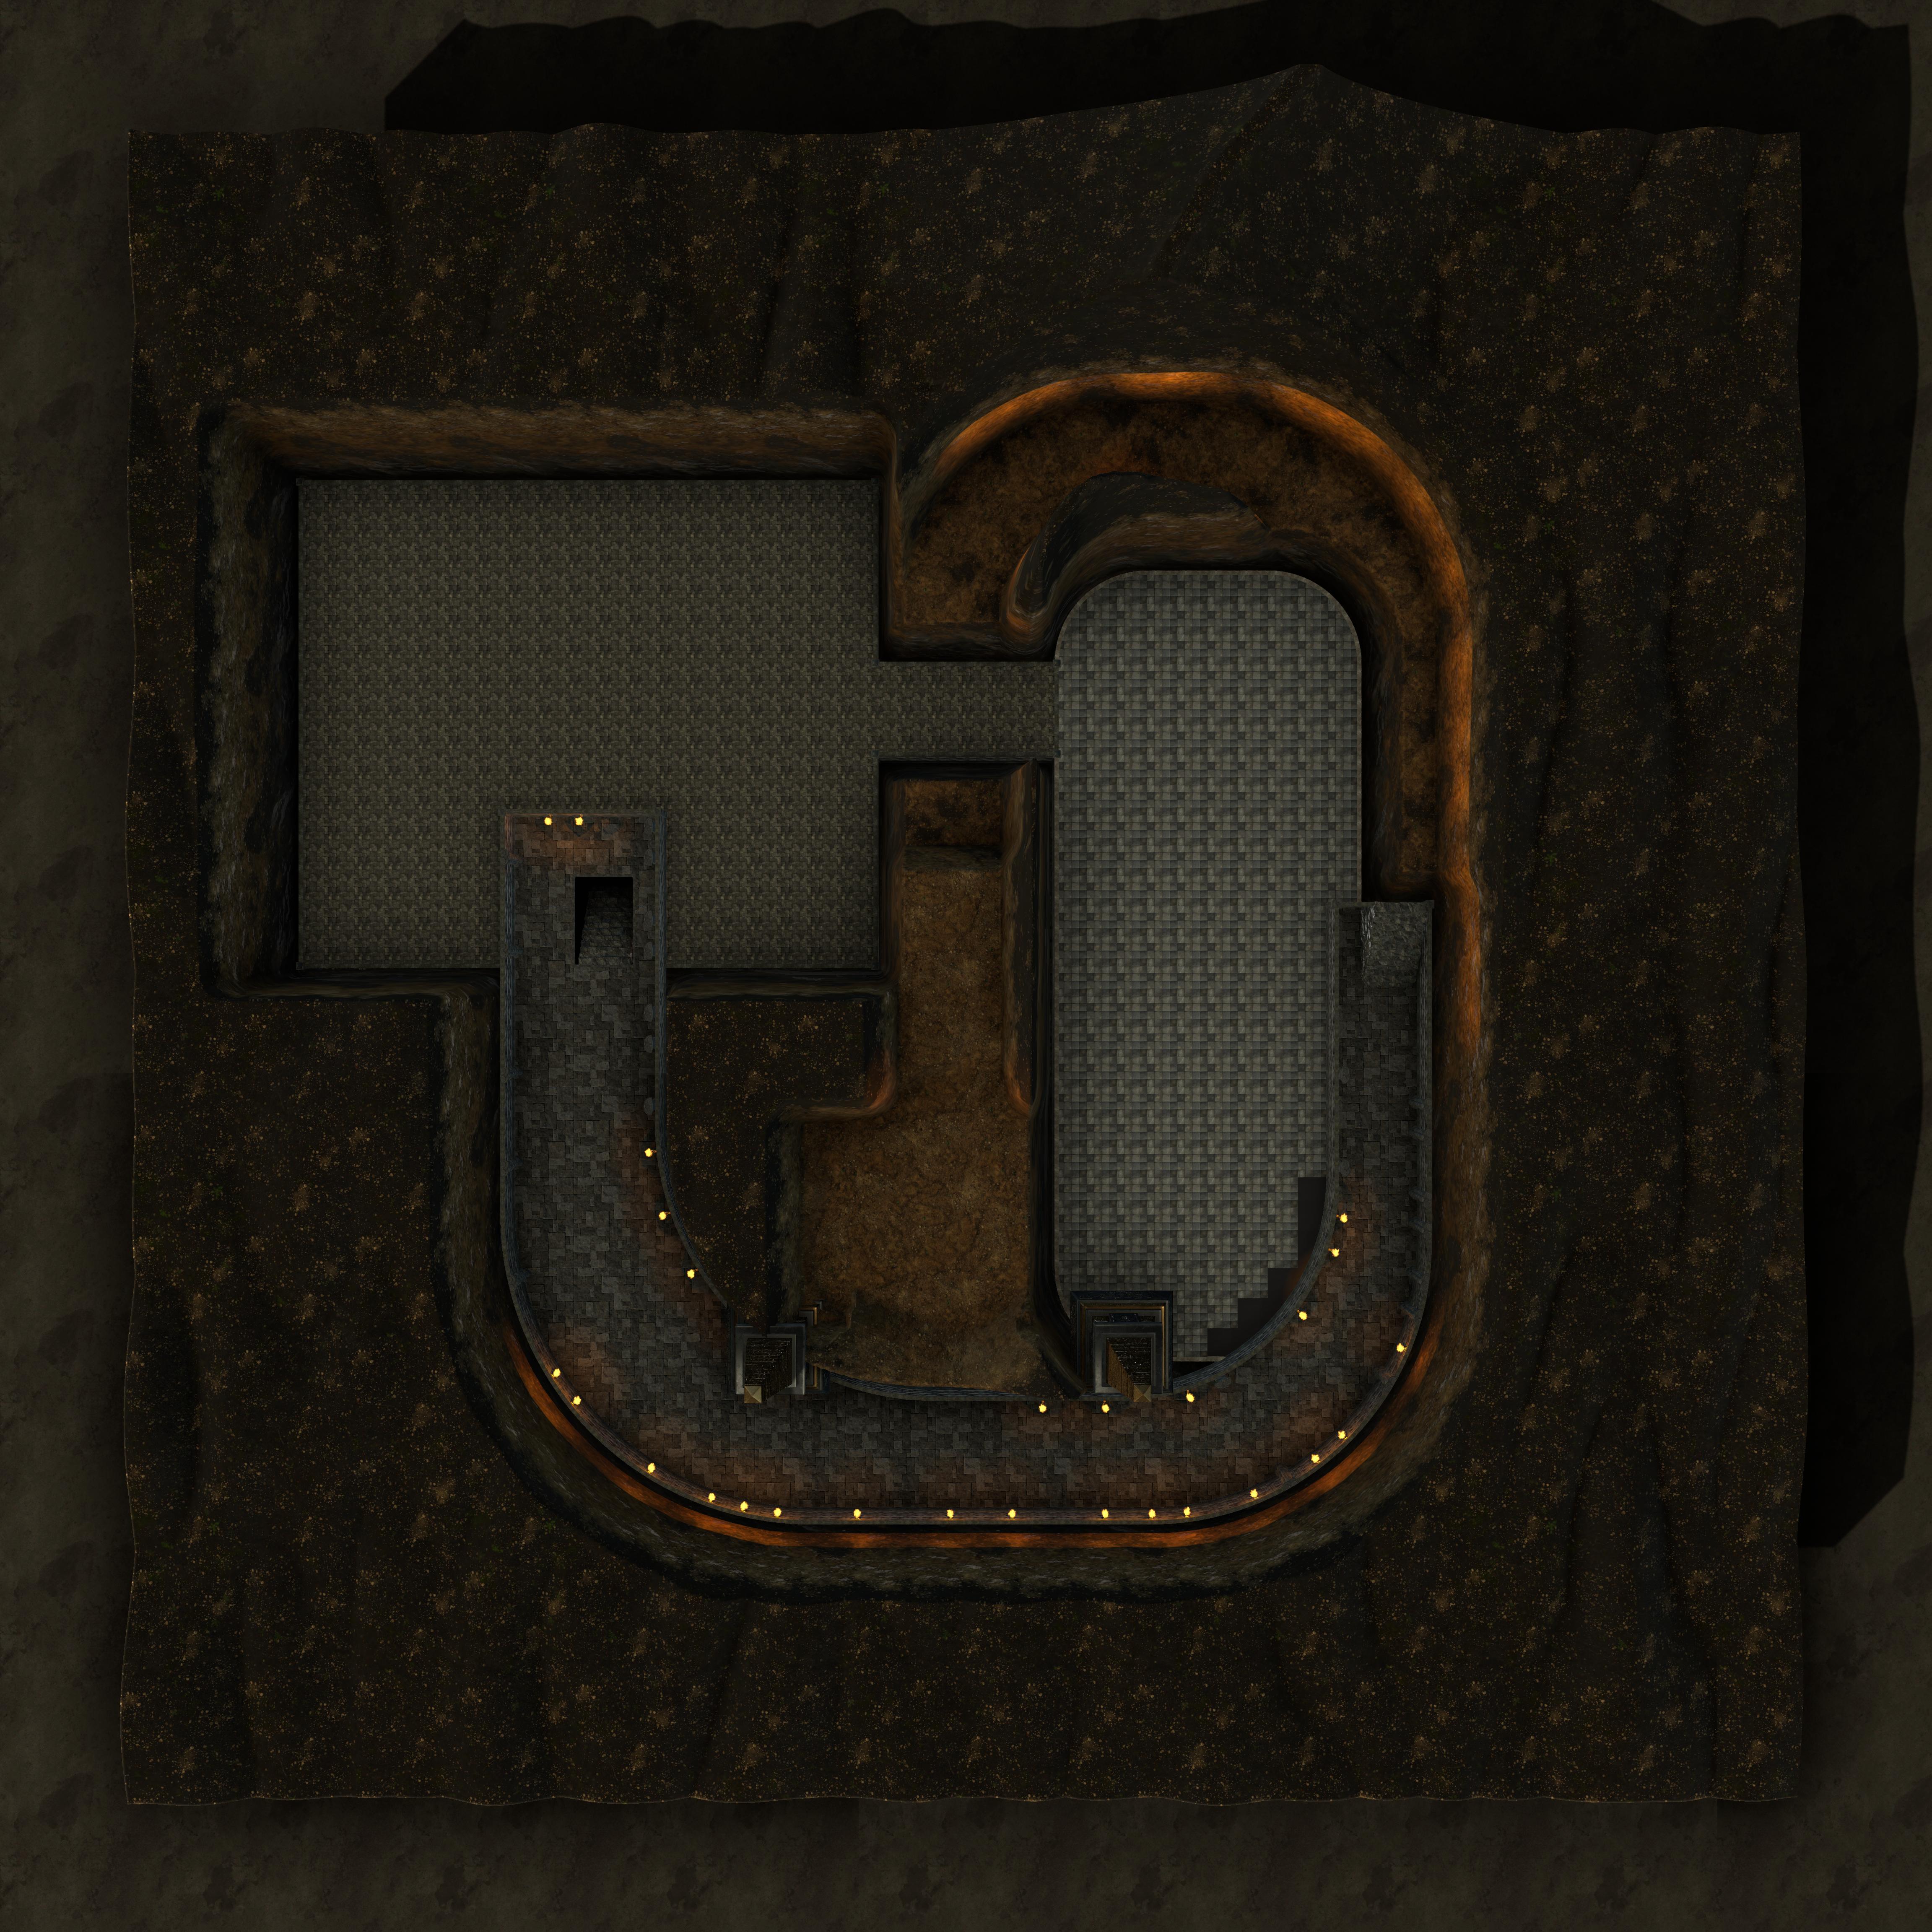
4 - Curving Hall
This hallway features torches that flare to life as they are approached. The light they give off is very bright.
The light of the torches throughout the complex is so stark as to illuminate everything sharply. Stealth Checks are made at disadvantage while inside the tomb.
5 - Stairs
A set of stairs cut directly into the rock of the desert floor, leading to the next level of the tomb.
6 - Trap Lever
This torch, when levered into position, deactivates the upcoming lightning trap for twenty four hours.
Characters with a Passive Perception pf twelve or higher will notice there is something different about the torch and its sconce. A DC12 Intelligence(Investigation) check will reveal it to be some sort of lever, or switch, although its use will not be readily apparent.
7 - Lightning Trap
Unless the lever at #6 has been pulled, the obelisks directly above this point in the tunnel will arc electricity between them for a moment, releasing a static charge into the tunnel thirty seconds later.
8 - Stairs
These stairs lead to the next level of the deeply-delved grave site.
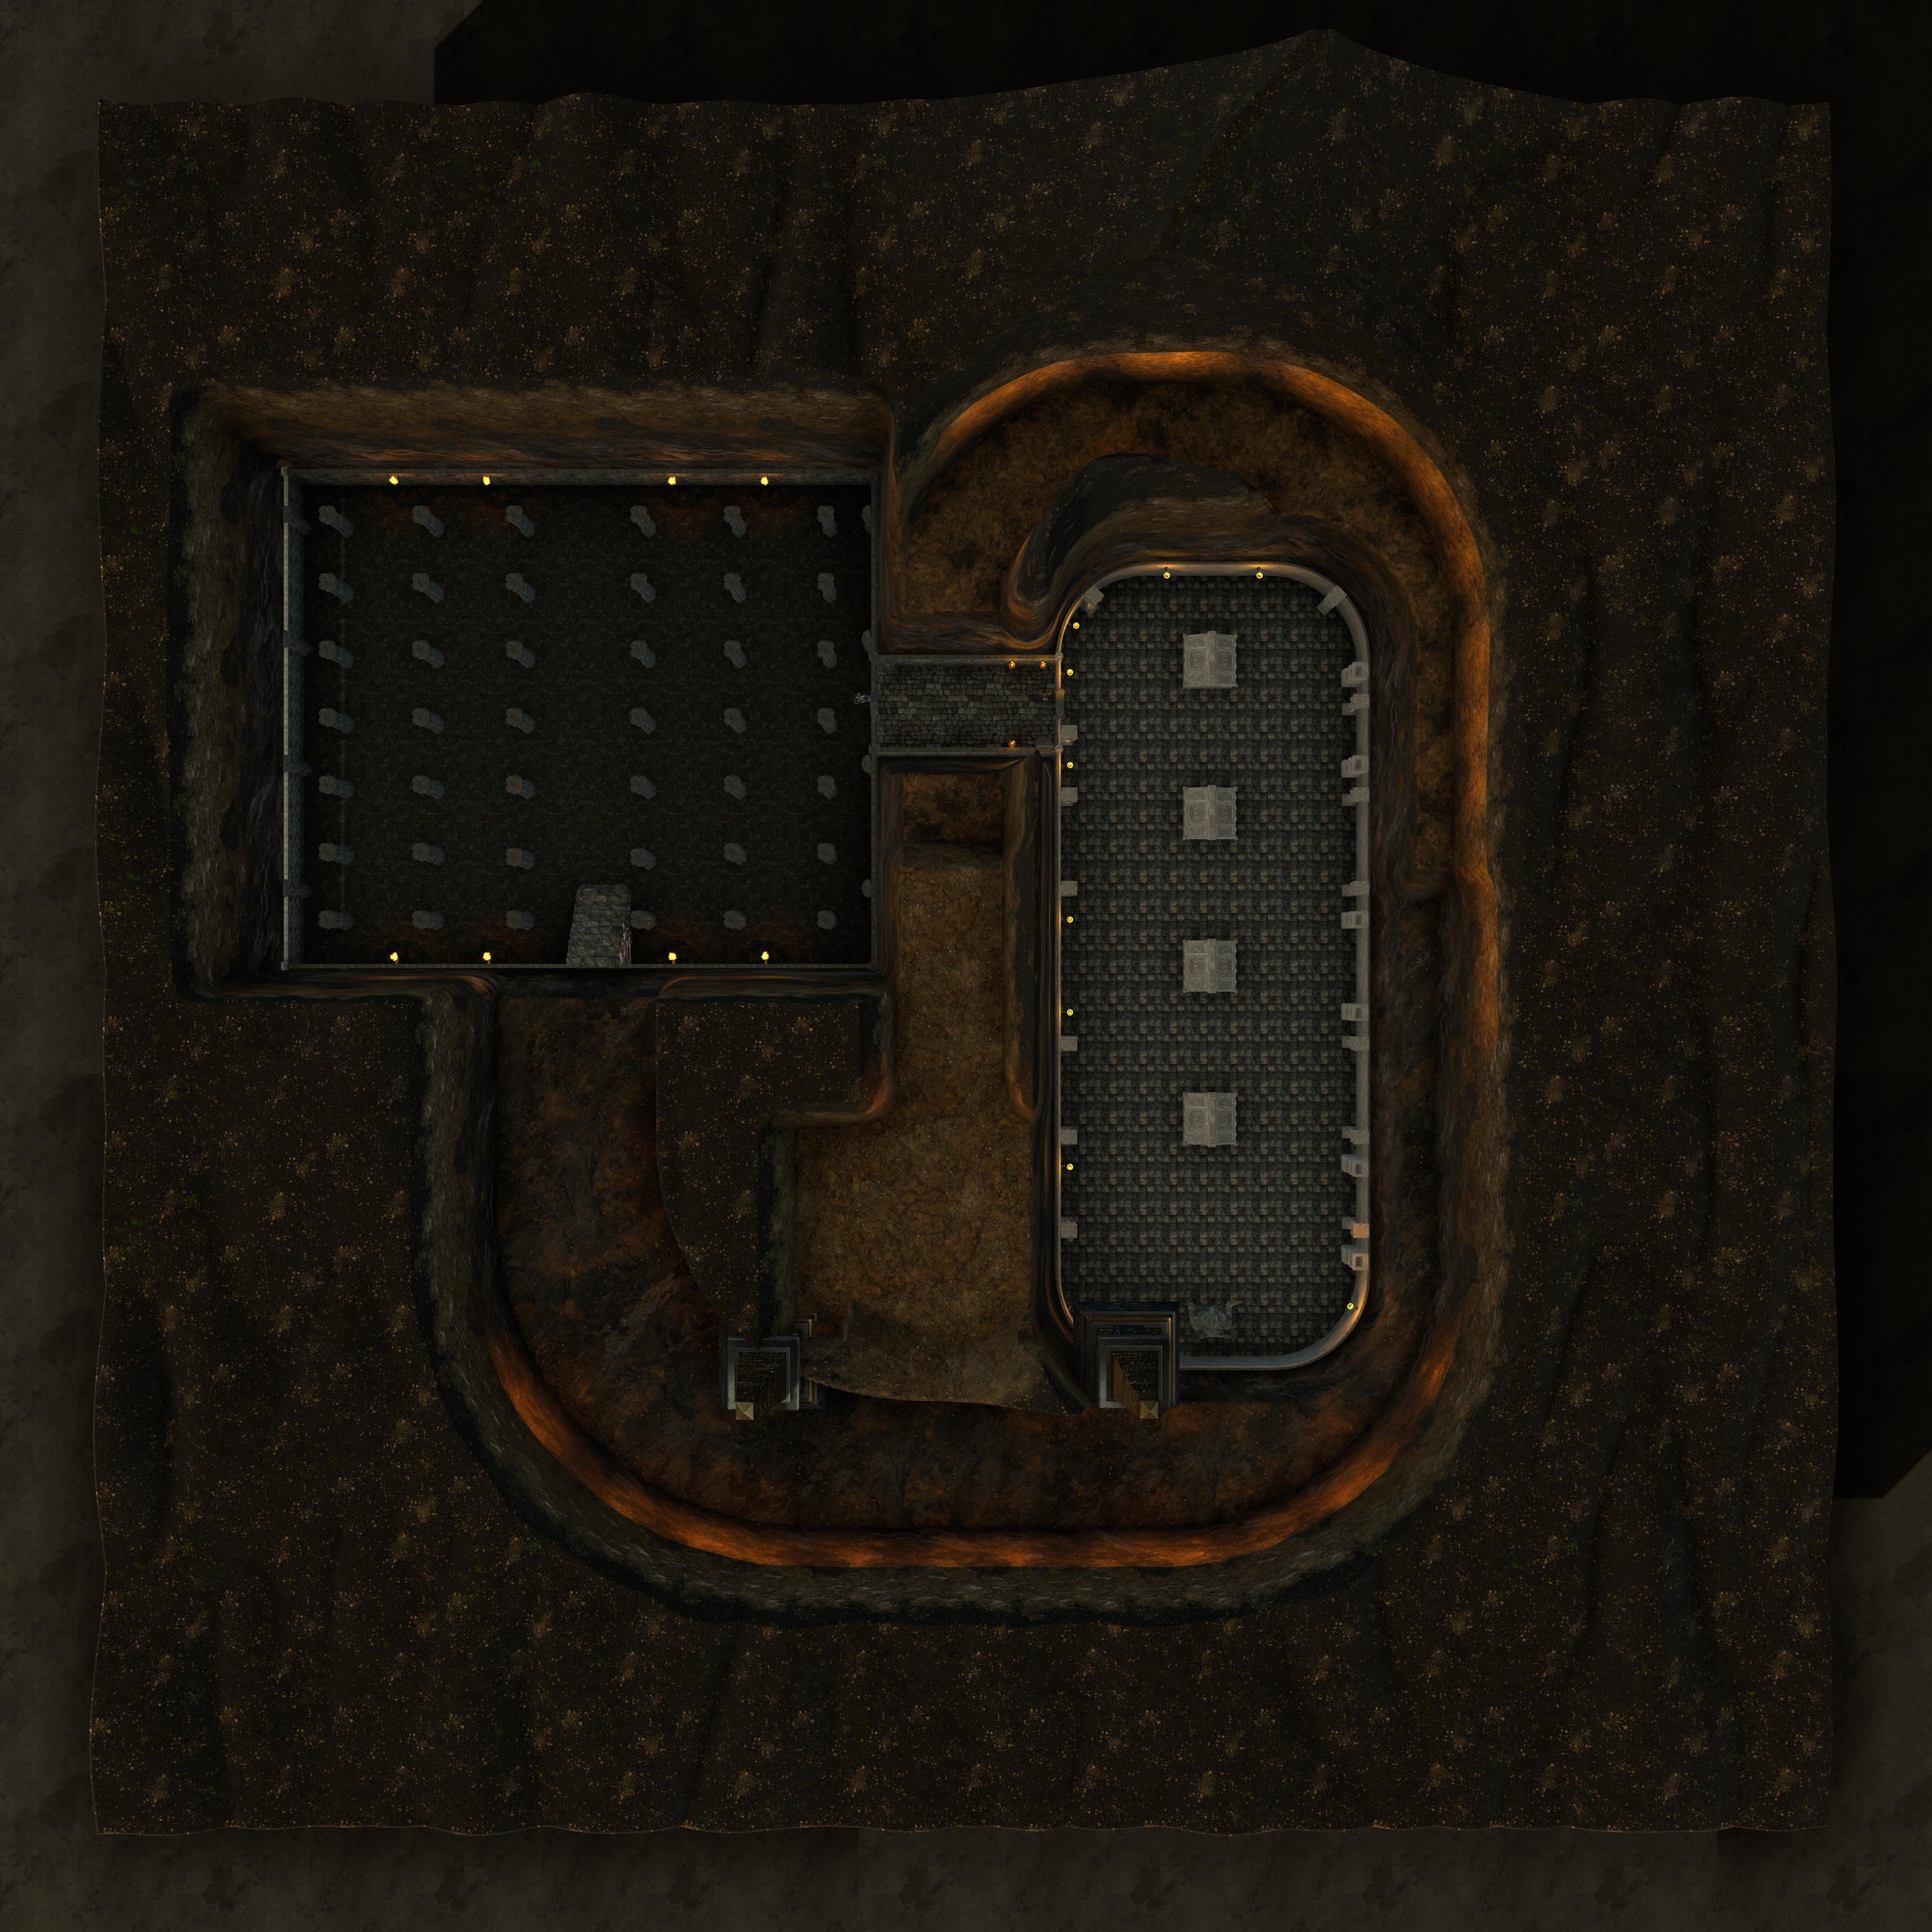
9 - Shadowed Hall
This large room contains a multitude of columns, each shaped slightly differently so as to throw specific shadows from certain angles. The effect is very disconcerting, and makes your vision seem blurry and vague.
GM Note: Mechanics
The characters will have disadvantage on attack rolls and concentration checks while in this room. Additionally, the low light will give the attacking Shadows certain advantages noted in their statblock.
GM Note: Gameplay
When the characters enter this room, their shadows detach themselves from the walls and floor and begin to stalk them. A character with a Passive Perception of twelve or higher will notice that their Shadows are acting strangely, just before they silently attack!
10 - Pendulum Hall
Three razor sharp pendulms rock back and forth in this hall, five feet apart from one another.
Read the following aloud
Three bladed pendulums rock back and forth, equidistant from one another. On a copper plaque mounted on the wall with brass bolts, an acid-etched inscription reads:
Three tongues of steel swing side to side,
Their song is death, but time’s your guide.
Mark the rhythm, steady, true—
One, then two… the third is due.
Step not when first they sing their hymn,
But on the third, your path grows firm.
Trust in the count, not in the blade—
And you shall pass, unscarred, unscathed.
A DC15 Athletics or Acrobatics check is required to get past each of the blades in this hall unscathed. A failed check means 3d6 points of slashing damage, or half as much on a successful DC20 Dex Saving Throw. If the riddle is solved and the characters step on the third swing of each blade, they will be completely safe.

11 - Burial Chamber
The final resting place of four generations of Barrax the Sage's family are interred here in honor. They lived their lives as exemplars and teachers, and the respect they were afforded is evident here in every attribute of the tomb. It was built with immense care and attention to even the smallest detail.There are four marble mausoleums, each carved decorously and with minute precision, marching down the middle of this long, narrow room. The southern end of the chamber holds a statue of a raging efreeti, about to go to war. The statue is massive, and carved so magnificently that it seems to leer at you from the shadows of the far side of the room. The ceilings are ten feet high, here, and the floors tiled with marble. The stone-brick walls are lined with columbaria and support columns. The air is tense, as if the room itself is waiting for something to happen. What's your next move?
If any of the contents of the burial chamber are defaced, or broken, the statue of Litpyre will emit a red mist that will materialize into the efreeti that has been trapped in the statue.
11a - Trap Lever
This torch is the control lever for the pendulum trap.Levering the torch into the correct position will lock the heavy blades in the "up" position.
11b - Veilbryte Mausoleum
This marble burial chamber is carved on every possible surface. There are cupids, scrolls, hearts, and music charts, all sculpted in miniature and with a jeweller's attention to detail and precision. The doors to the moratorium are shut, and locked with a heavy chain and hanging padlock.
GM Note: Mechanics
The lock can either be broken (AC10, 15HP), or picked with a DC15 Dexterity(Thieves' Tools) check. The chain can be broken with a DC20 Strength Check, which can be made at advantage if the character uses some sort of crowbar, or prybar.
- Circlet of Silver Tongues: A diamond tiara that grants advantage on Persuasion Checks. Can cast Comprehend Languages at will, and Mass Suggestion once per day.
- Perfumed Handkerchief of the Lulling Veil: When wafted, creates a calming aura. As an action, can cast Calm Emotions or Sleep (once per long rest).
- Flame Tongue Rapier: You can use an action to speak the command word and cause this rapier to burst into flame, dealing an extra 2d6 Fire damage on a successful hit.
- Riches: A chest containing: 2d20*10 GP, 3d20*5 EP, and 3d100 SP
11c - Blackmantle Mausoleum
Carved with stunning narrative bas relief featuring cavalry, battle standards, and tactical maps, this mausoleum contains the remains of a family known for its battle commanders and horse farms. The doors to the building have three keyholes, one marked with a shield, another with a helm, and the last with a gauntlet. A brass plaque bears the following acid-etched inscription:
First the shield, to brace the blow,
Then the helm, to see the foe,
Last the gauntlet, hew with might—
Lest the Royal Blackmantles fight.
The locks need to be opened in the order given in the riddle, or an ancient and deteriorating Glyph of Warding will explode, for 3d8 points of lightning damage, in a 20' square in front of the doors.
- Blackmantle’s Shield: +2 Shield. It absorbs and stores forces damage, able to release it once per day as a Thunderwave.
- Marshal’s Gauntlets: Can use Command as a bonus action, once per short rest. Grants Leadership Aura: +2 to allies’ Saving Throws within 10 feet.
- Battle Standard of the Last Stand Can be planted once per day to give allies within 30 ft +2 AC and Saving Throws for 1 minute.
- Riches: A chest containing: 2d20*10 PP, 3d20*5 GP, 3d100 EP and 4d20*5 SP.

11d - The Vayille Mausoleum
This mausoleum is intricately carved with ravens and crows, each of which is delivering a secret to a veiled person sitting in a secret garden, indicated by a rolled up scroll clutched in each corvid's talons. They are clamoring to get to the gatherer of secrets, as if they want either to love or attack the shadowy figure. There is no keyhole to unlock the doors to this building.
A DC20 Intelligence(Investigation) check will reveal a keyhole in the end of one of the hundreds of scrolls of secrets. It will take a DC20 Dexterity(Thieves' Tools) check to pick the lock. Alternatively, the doors can be broken open (AC12, 55HP) using Bludgeoning damage.
- Veil of the Forgotten Name: A hooded cloak that grants the wearer the ability to cast Pass Without Trace twice per day, and Disguise Self at will.
- Eyes of the Echo: Crystal lenses embedded in a black, leather, half-mask. Grants True Seeing. Additionally, it can “record” a short, up to thirty second, moment and replay it as a Major Image.
- Needle of No Sound: A +1 silvered dagger that makes no noise when it is drawn, thrown, or strikes. Casts Silence on 19 or 20 to hit. Returns to scabbard when thrown.
- Riches: A chest containing: 4d20*5 PP, 5d20*10 GP, 1d100*5 EP and 5d20*5 SP.
11e - The Barrax Mausoleum
Herein is interred Barrax the Sage, as indicated by the scrolls, plumes, pens, pencils and paper intricately sculpted from the marble of the mausoleum's walls. There is no lock on the doors, simply a blackboard and a piece of chalk underneath a brass plaque that reads:
"I am taken by the ignorant,
Spent by the wise,
Guarded by the dead,
Yet feed the living’s rise.
What am I?"
The answer, "Knowledge", must be written on the chalkboard for the doors to swing open automagically. Alternatively, the doors can be smashed open (AC 12, 55HP) using bludgeoning damage.
- Justicar: Barrax's legendary Rod of Lordly Might.
- Barrax's Spellbook: Not just a spellbook, but a Chronicle of Threads Unseen, this tome contains rare and forgotten spells, and there are prophetic footnotes written in the margins.
- Soulglass Lens: A monocle that allows the user to see lingering echoes of powerful spells, even after they’re cast. It is essentially detect magic, with shades of spell school and strength.
- Phylactery of Retention: Stores a single, 6th-level or lower spell. The spell is not consumed when cast, but only resets on a new moon.
11f - Litpyre
The efreeti Litpyre has been trapped in this statue for several thousand years, and yearns to be free. Still, he is bound by infernal contract to defend this tomb from defilers.GM Note: Mechanics
If anyone desecrates or breaks anything in the tomb in any way, Litpyre will materialize and attack. He has been here a very long time and is weakened, but he is still a formiddable opponent and will pose quite a challenge if he is invoked. He has some very specialized loot if he is killed.
GM Note: Loot
Scimitar of Speed, Scimitar of the Inner Forge, Bracers of Defense, Cindersoul Ring

Comments