Peeking Inside the Macintosh Plus
Of course, peeking inside the machine wouldn't be complete without going full nerd! It's our writer after all and she just loves to tell everyone - or rather annoy her husband into oblivion - about her CPU knowledge, but also asking about the various components. There's more to this Macintosh than just a motherboard; it also has a built-in CRT screen which has all the necessary components to operate it on a separete analog board.
Open Sesame!
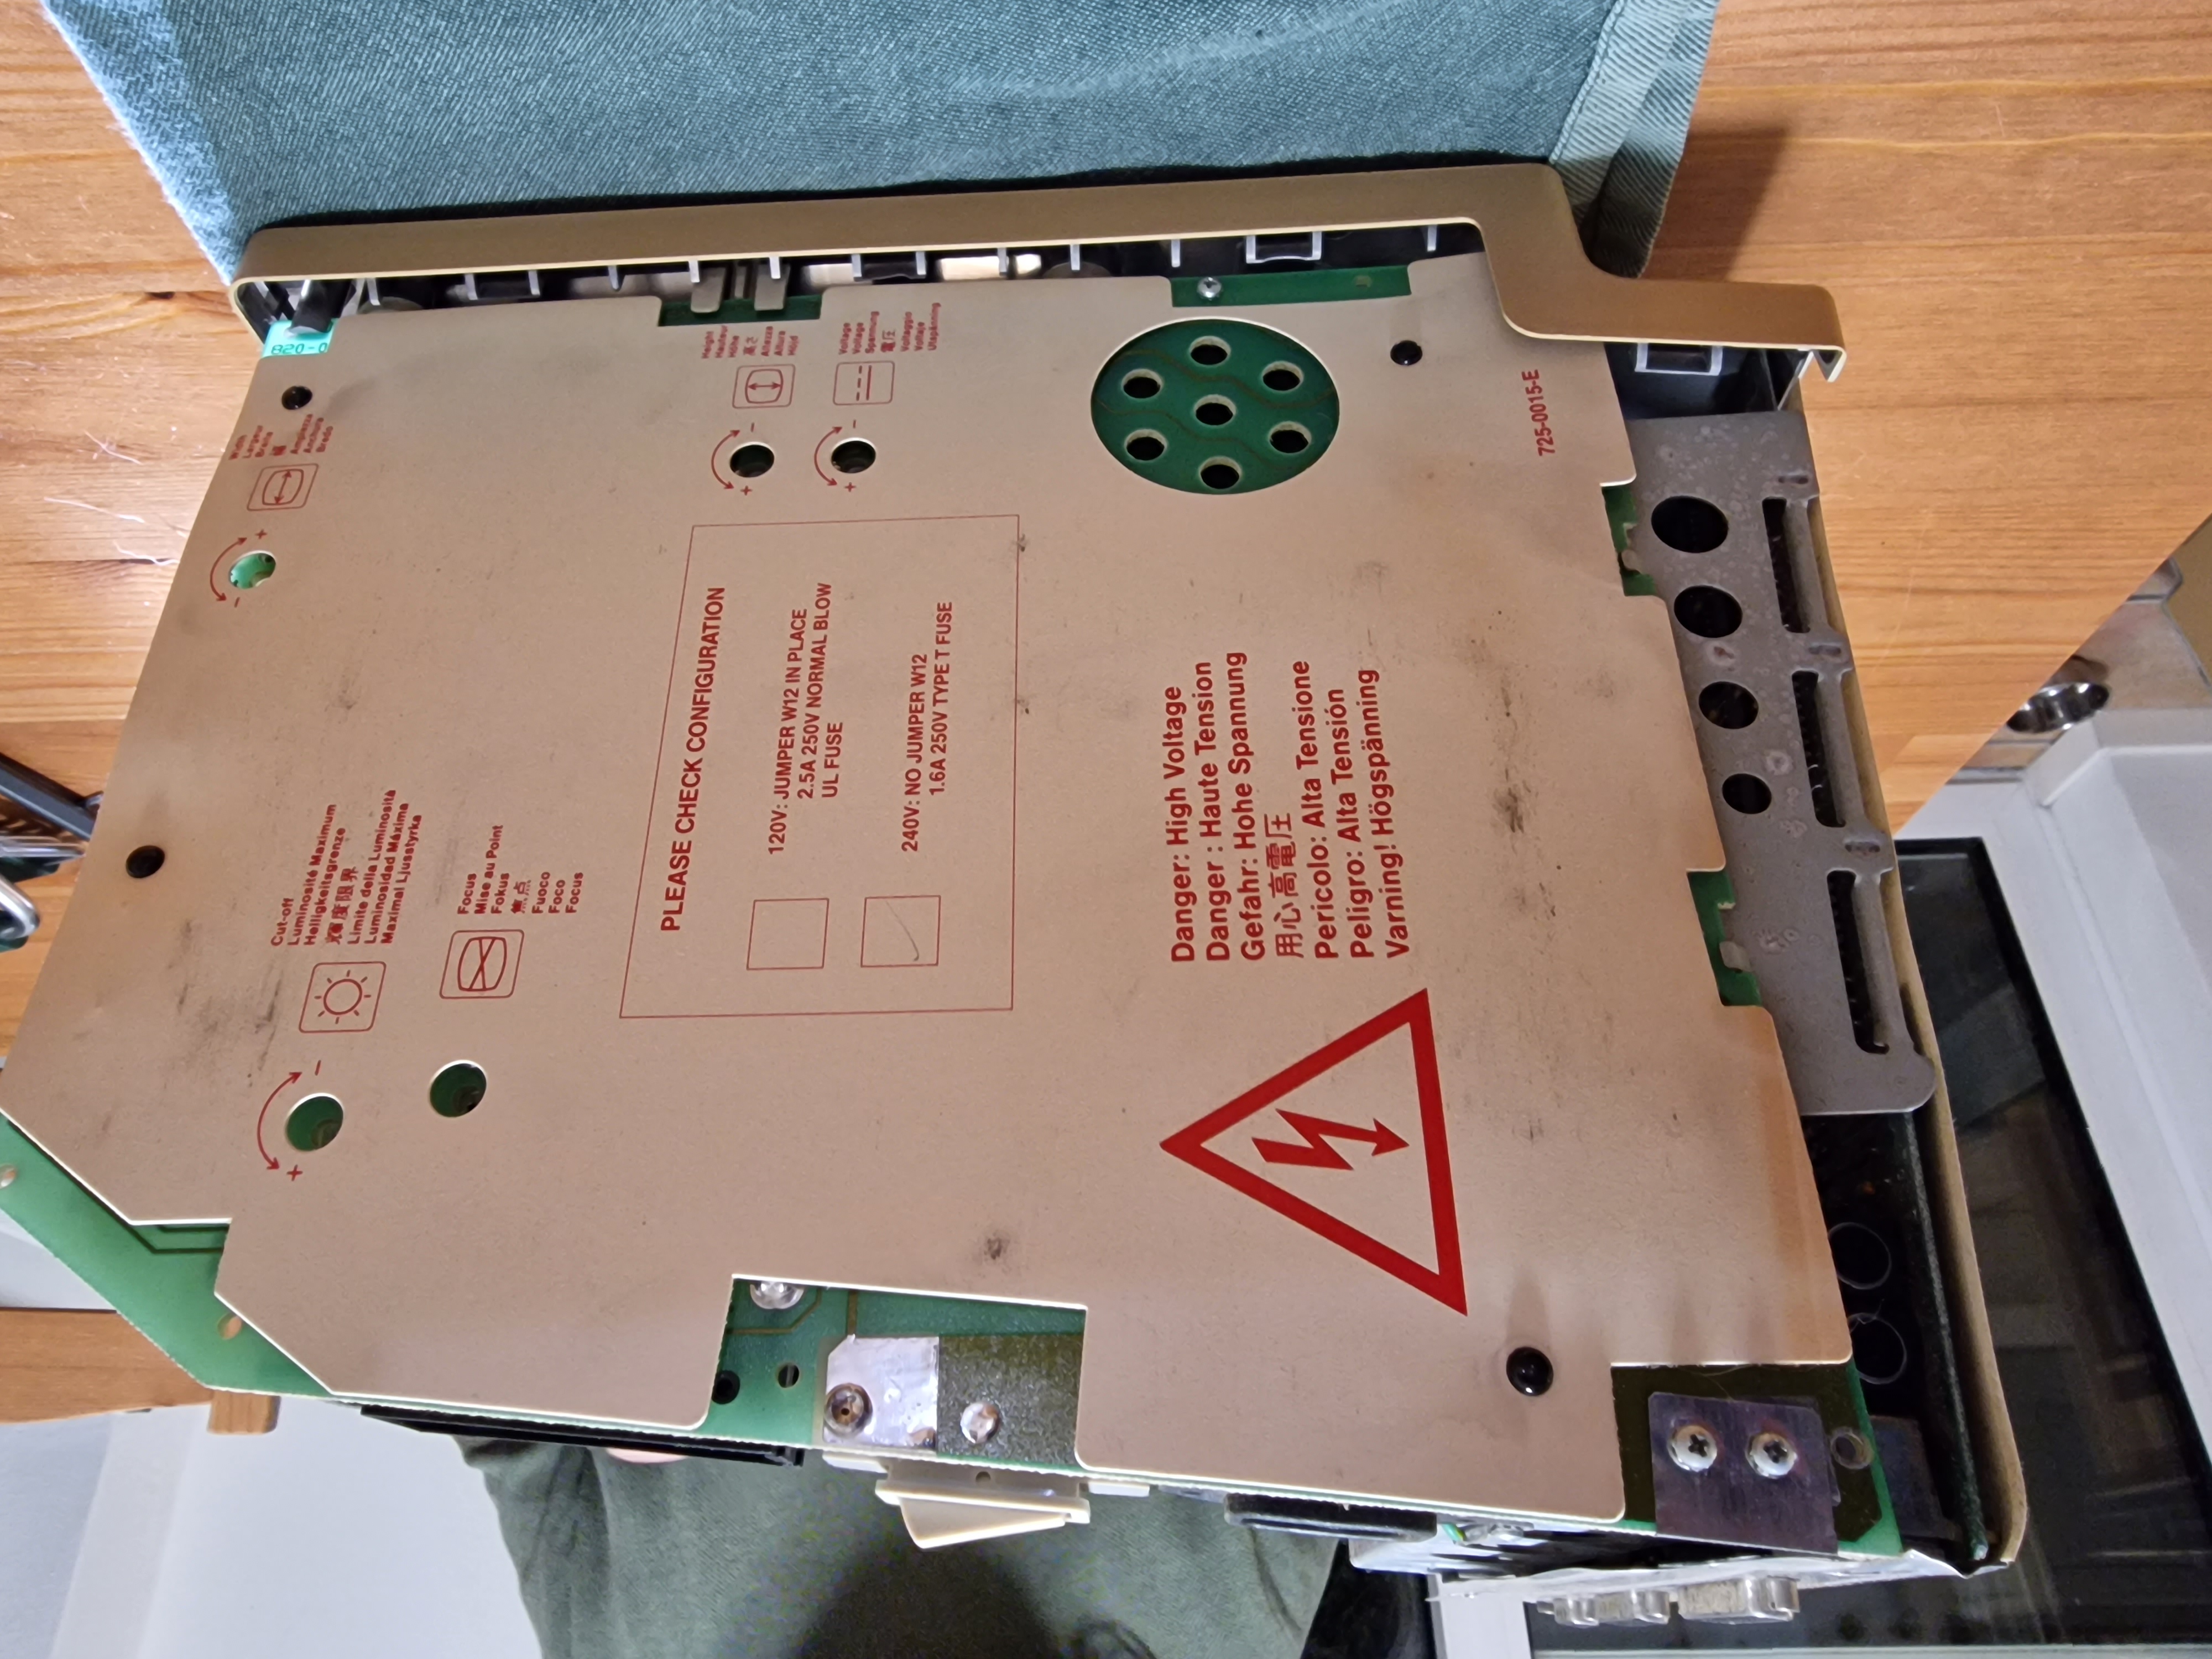
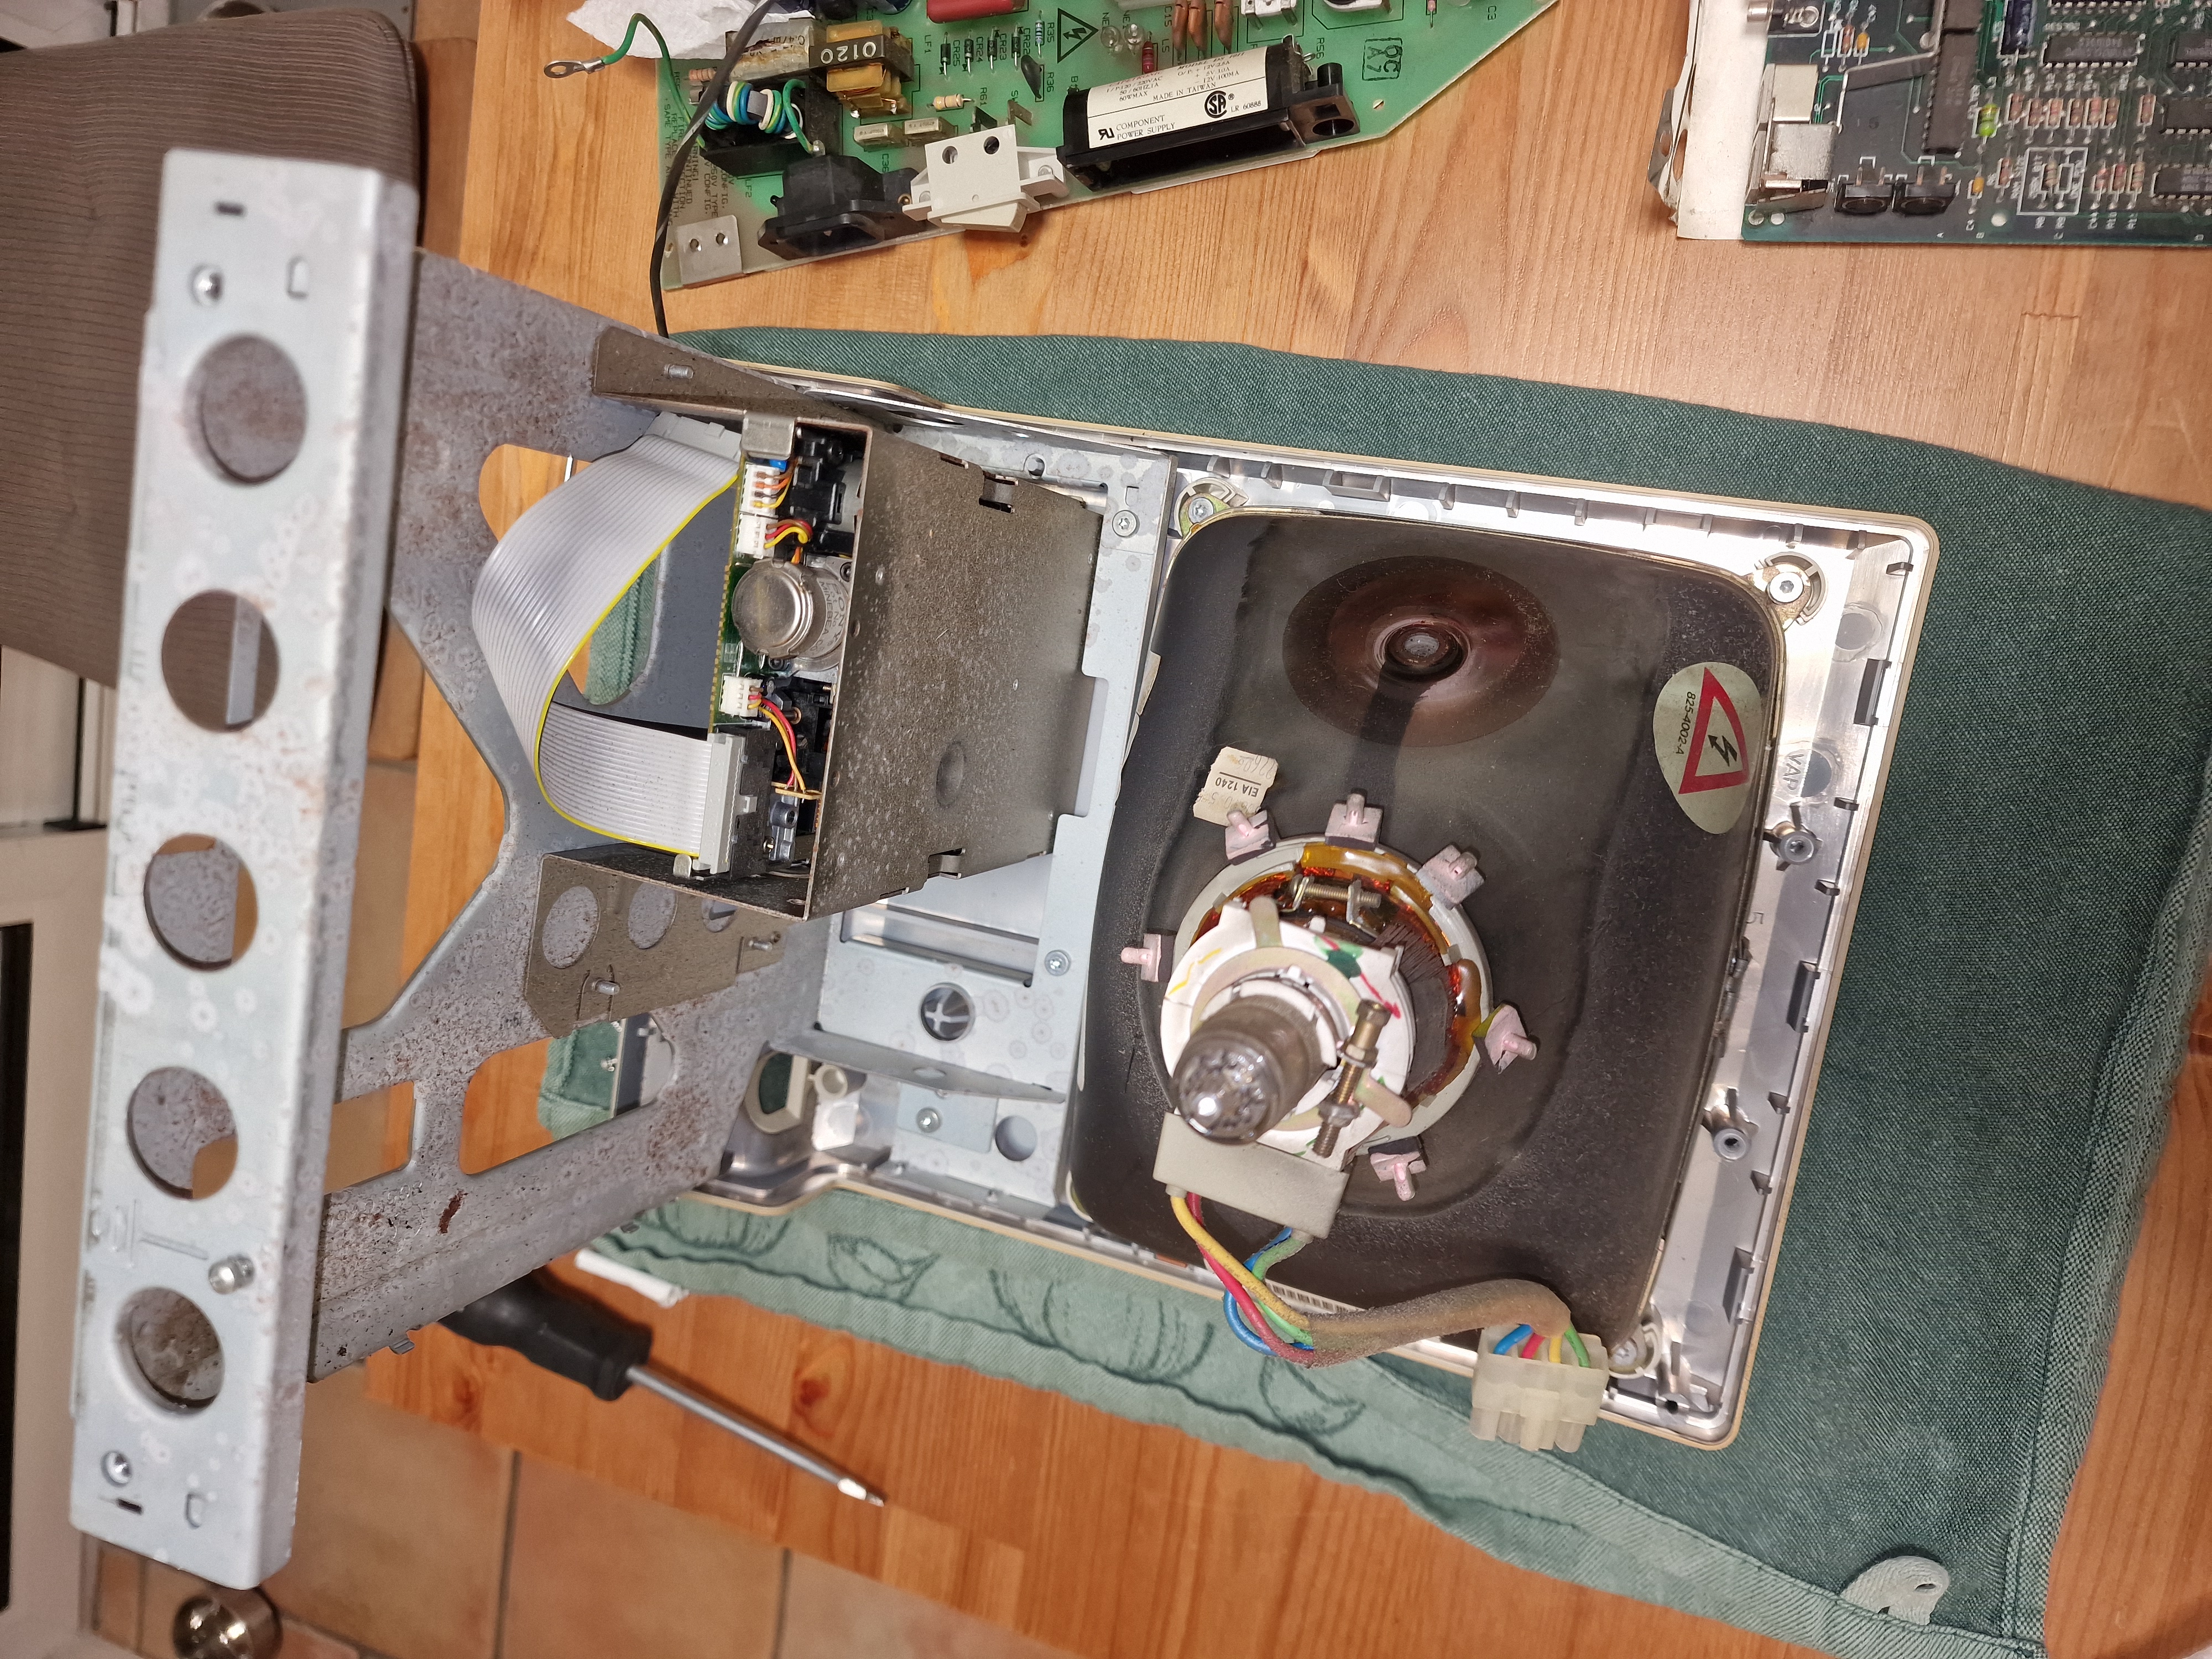
Getting a Macintosh like this one to show its internals isn't as easy as it seems. Being a compact computer, Apple thought it'd be a grand idea to make a little handle in the case. While it is absolutely brilliant and definitely allows you to carry these machines with relative ease - I mean, they still weigh 7.5kg or 16.5lbs so they're not exactly light for current day standards, but for back in the day it was considered light as a feather - it also makes unscrewing the two screws tucked in that gaping hole an absolute pain in the butt. Essentially, there are two ways of opening this behemoth: either you have a long enough torx screwdriver to comfortably take out the screws or having a shorter torx screwdriver and.. cry. But have faith, as I have discovered a third option: a very persistent and determined bully of a husband who will open that case even when his tools are too short. Granted, I'm very lucky to have this amazing third option, but for the DIY beans out there wanting to do this too; either be determined, or just get the long boy and save yourself a headache and pain in the fingers. With all case screws finally out and a little finnicking with the outside shell, we can finally gaze at the machines insides. A thing to note before progressing any further: DO NOT TOUCH ANYTHING JUST YET! In case you don't know how CRT screens work or you are too young to even have seen such a thing (yes, I feel old now these screens work with stupid high voltages that - if not properly discharged - can fry you. They are lethal. So, again, discharge the CRT before working on it! If you don't know how to do this, you can follow this YouTube video to learn how to safely discharge the CRT. My husband did the discharging of the screen, because - kind of rightfully - he doesn't trust me to do it properly. I was way too excited and I am impatient, so he definitely made the right call there. Besides, if I fry myself, he'd never forgive himself. With the discharging done, (almost) everything inside is now safe to touch and to work on.Don't forget to look inside the case when you open one of these Macintosh compact computers! Many of them contain a good chunk of signatures from the people who helped developing this machine. It's these kind of personal touches that we don't see these days in modern hardware, sadly.
Let's Explore!
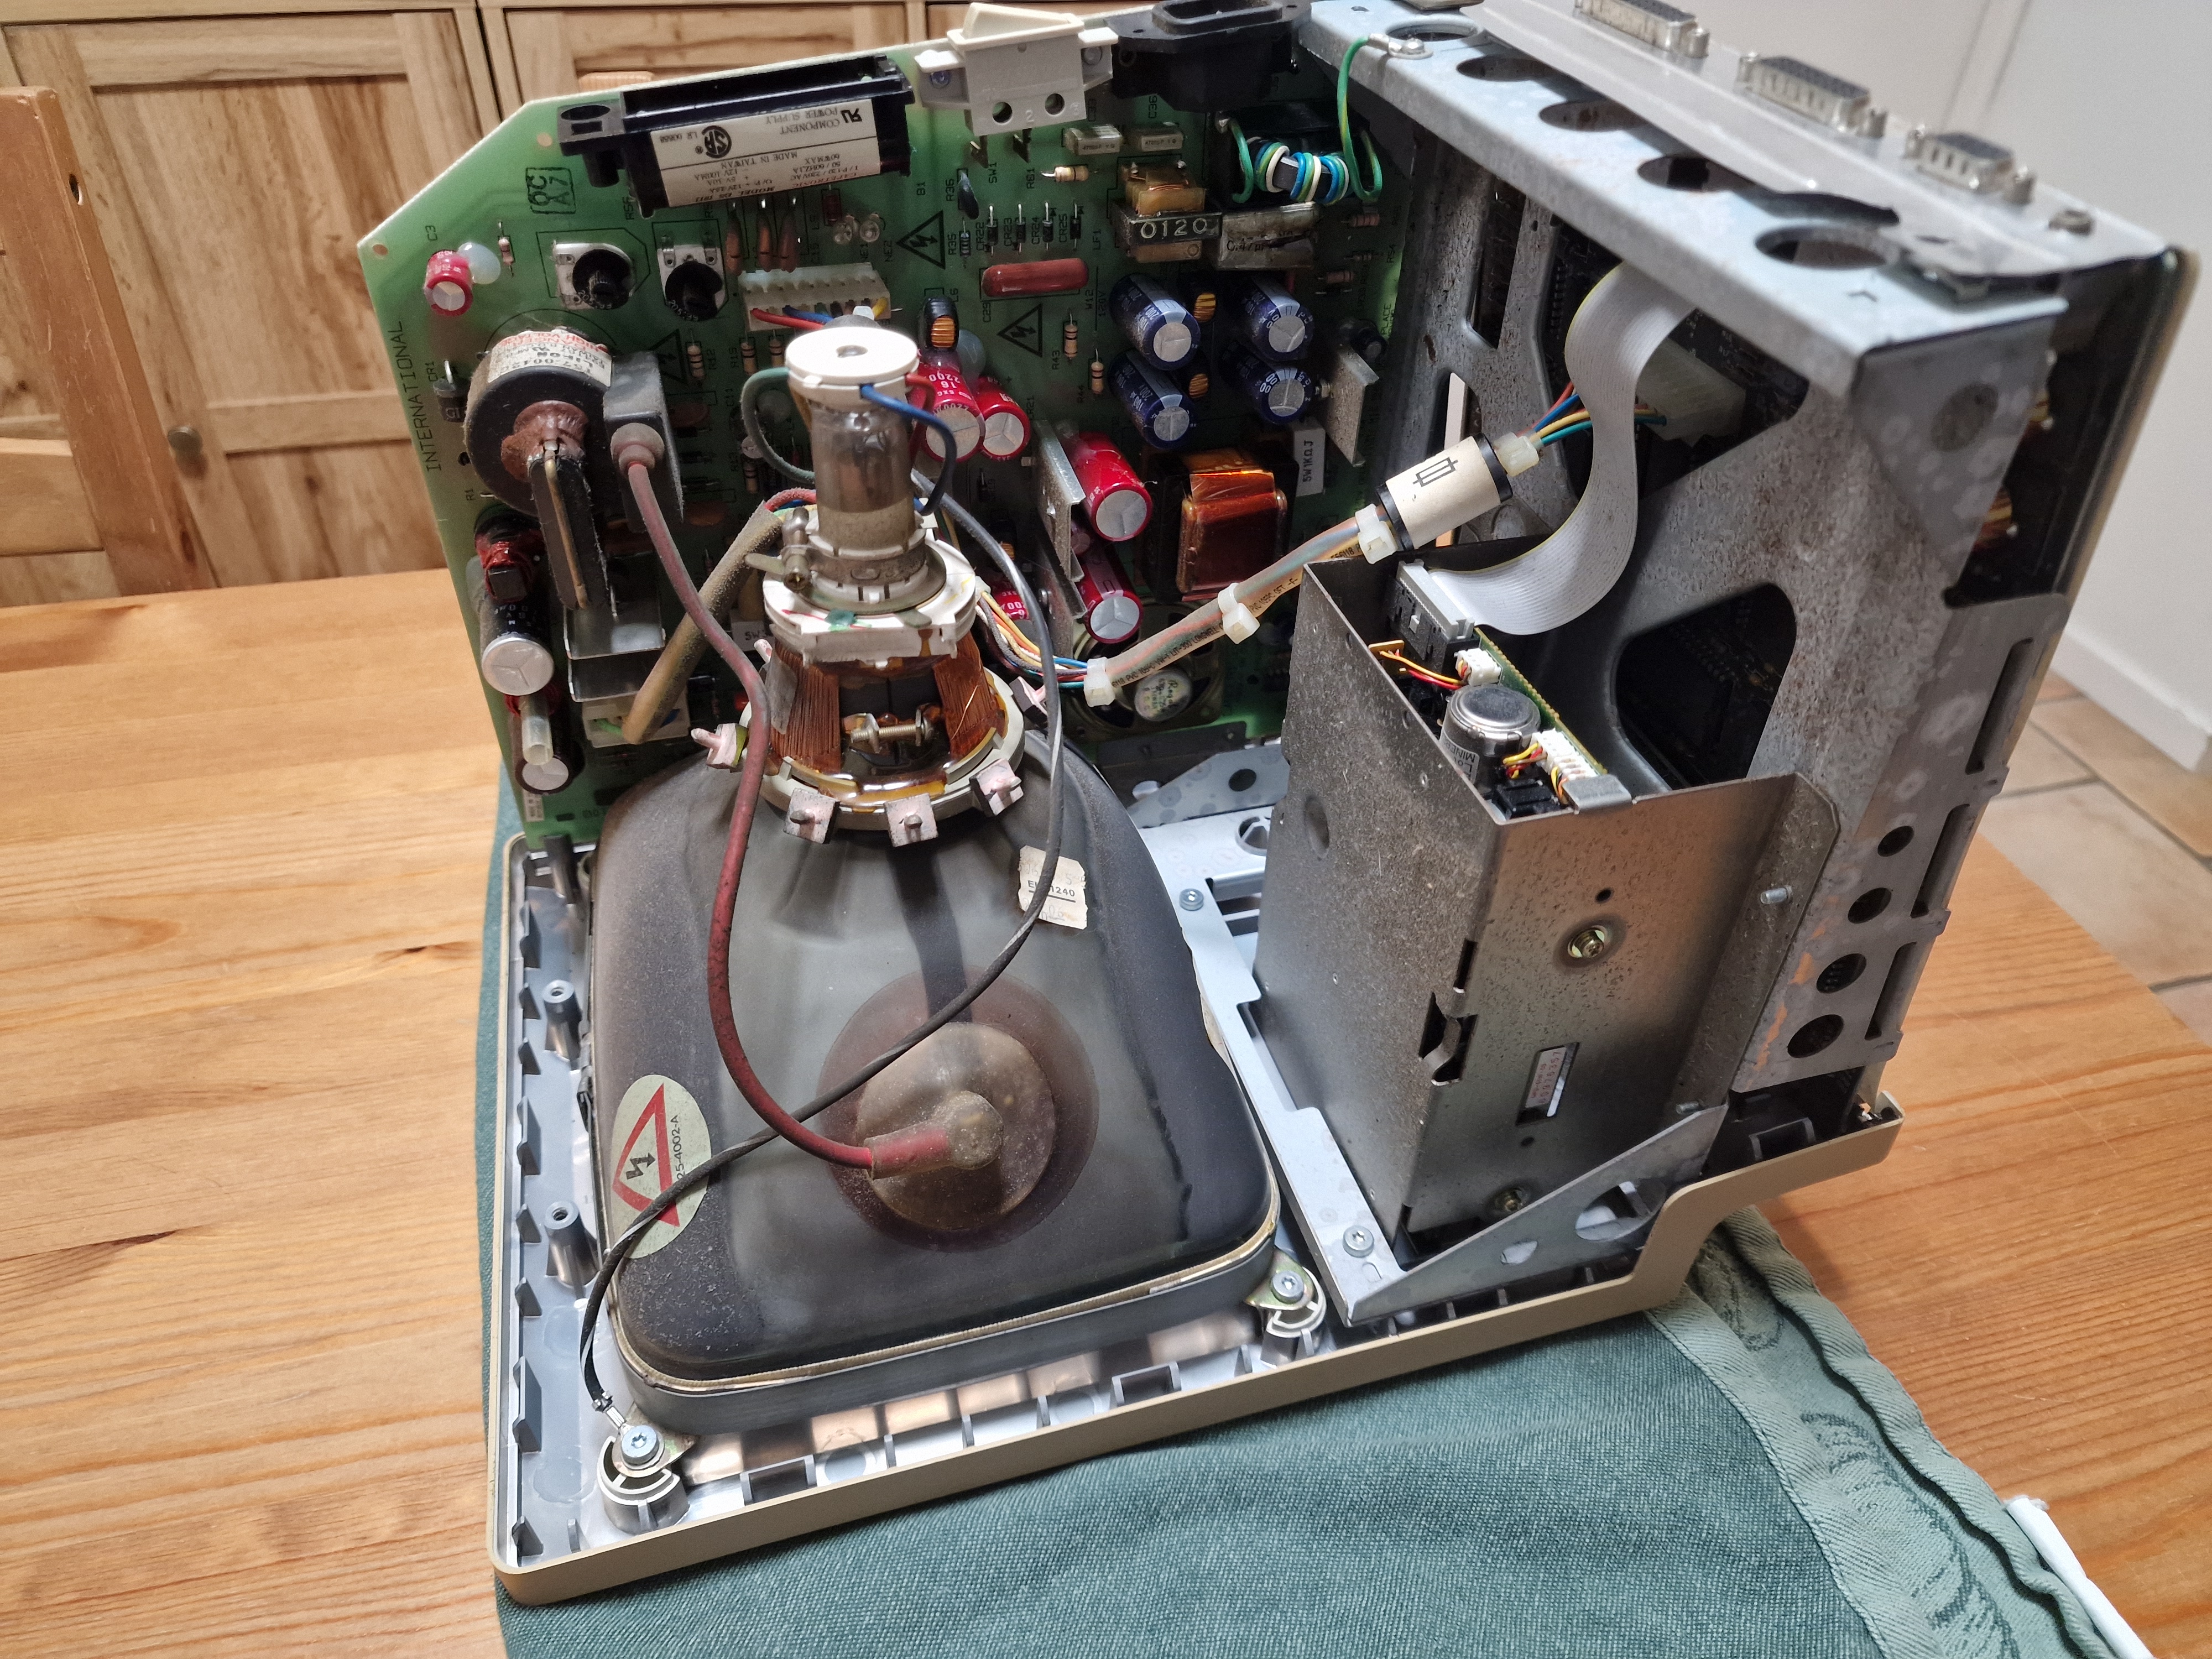
With Mr. PootPoot opened up and safe to handle, it's time to see what we have inside. There's a motherboard to check out, a floppy drive, a CRT, and an analog board; plenty of things to see!The Motherboard
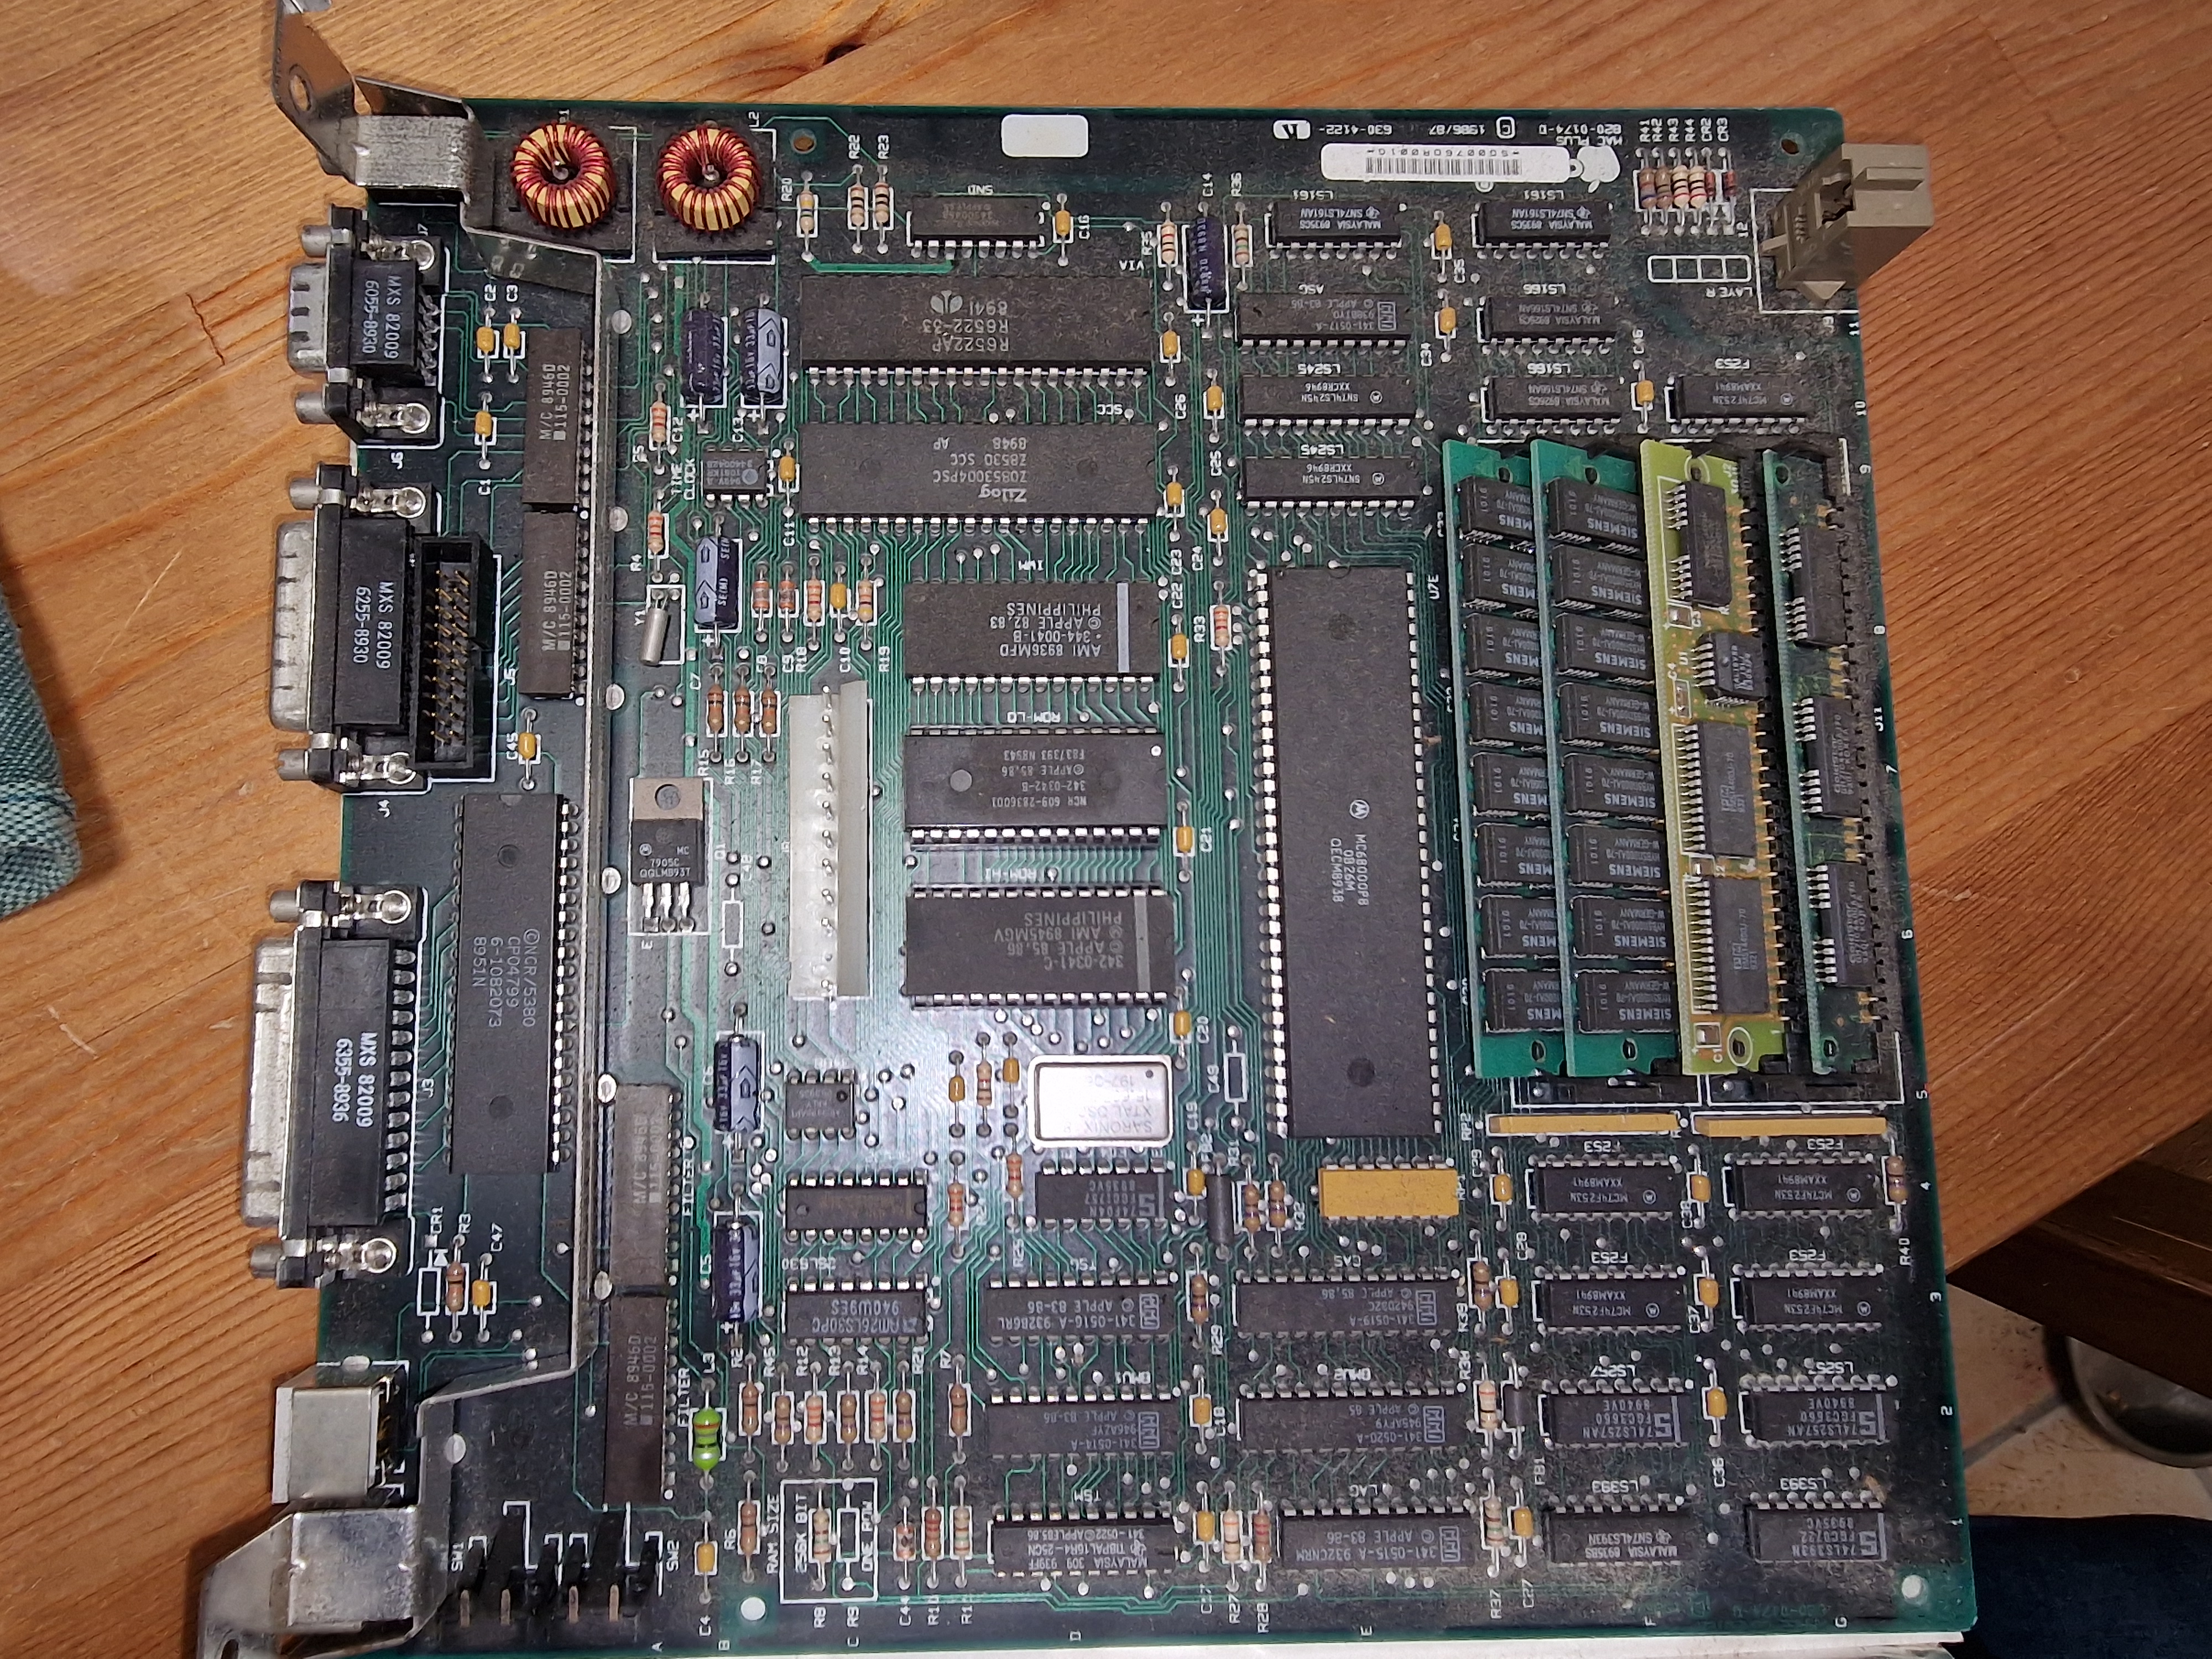
First things first - the, if you'd ask me, most interesting part of the entire machine - getting out the motherboard which seems fairly easy to do.. until it's time to pry out the power connector to the motherboard.. then it's.. let's just say, pulling that cable out without damaging anything is proper pain in the rear. In true Dutch fashion (aka, with a ton of creative language and colourful names), we managed to get it disconnected. A couple loosened screws later and the motherboard slides out fairly easily from the metal case. Yes, I am very aware that this board needs a good scrub to get that cake of dust removed. However, the goal at this point of the project is figuring out the things we need to do to get this Macintosh Plus purring like a kitten again. One of the things that immediately caught my eye was the filled up RAM slots; those tiny boards at the bottom of the motherboards that stick out a little. Two of the sticks are clearly different, which made me wonder: has this unit been upgraded before from its stock 1MB to 4MB RAM? I looked up the chips present on the RAM sticks to avoid getting them out entirely since the clips holding them in place are made of plastic and have gone fragile with time and thus are more prone to breaking off entirely when used. After a quick search, I found a few forum posts and ebay listings claiming that these chips were used for the 4MB upgrade! One of the upgrades I wanted to do was the upgrade to 4MB, so I can cross that off the list immediately. Other than a nice and expected layer of dust and the surprising RAM upgrade, I couldn't see much wrong with the motherboard. I made sure to note the several capacitors on the motherboard, so I could buy replacements for them. They aren't leaking yet, which means it's the perfect time to get them off the board and swapped with brand new ones. Saves a lot of time and stress cleaning and debugging if the corrosion of the capacitors have damanged any of the other components.The Analog Board
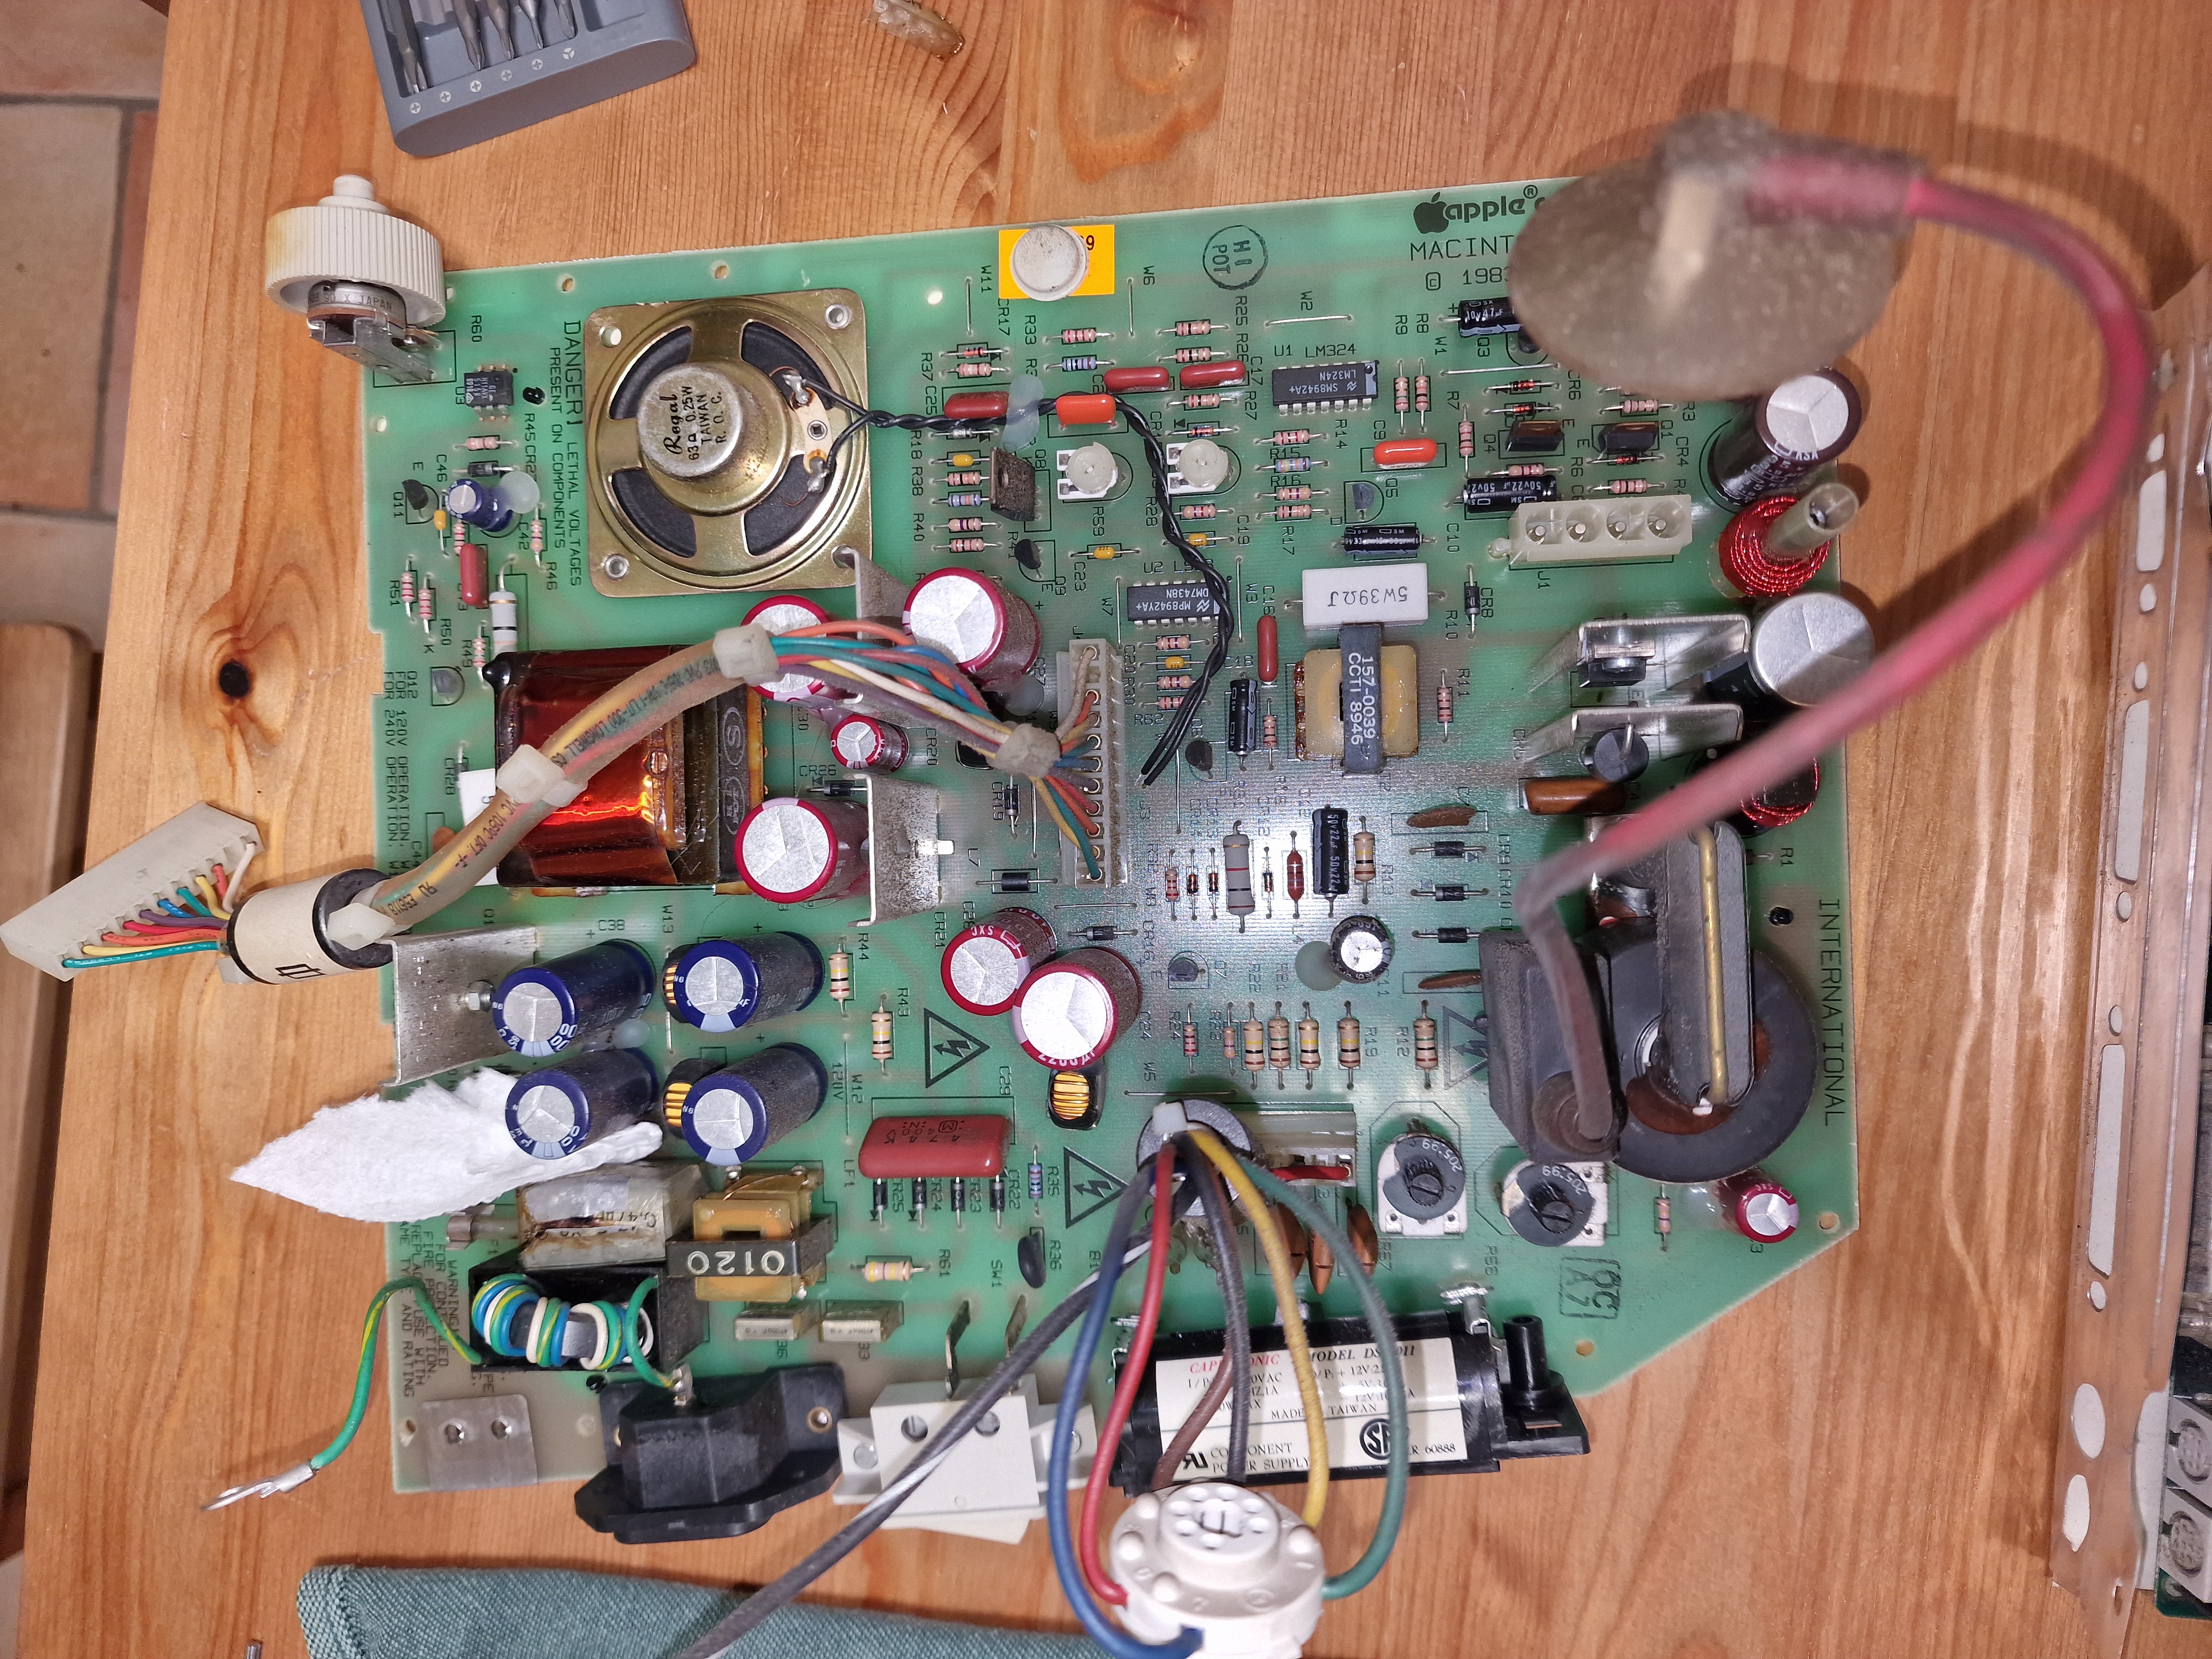
With the motherboard out of the system and inspected, it's time to take a closer look at the analog board. I can already hear the questions: what makes it an analog board, there's electronic stuff on it so how isn't it digital? And yes, I very much understand the confusion; I also had to ask Hubbs how in the hell it's analog, what makes it analog, and how in the world does the CRT get its videosignal it that's analog too? Uncovering this has resulted in two things: first, I now know what makes the board analog and second, I have at least three new rabbit holes to dive into one of which being how the CRT in the Mr. PootPoot actually works... Thanks Hubbs..The difference between analog and digital is actually quite easy! The Macintosh Plus has both types mostly on separate boards; the analog board that we're looking at right now is.. well, analog. The motherboard we looked at earlier is a digital board. The main question to keep in mind and ask yourself is: is there digital data involved? If I, Bit, or any of my family members go over a wire to bring some data to another component, it's a digital component. However, if I'm absent and no data travels over the wires, we're talking about analog. In the case of the Macintosh Plus, we can further drive it home with another example. There's the motherboard which clearly is digital and can do all the magic calculations. We can take this motherboard out of the case, attach it to a modern display and power supply, and it will work exactly the same way as it would when it's connected to the analog board. (Granted, you need to do some tinkering to get that working, but it's possible and done before!) I hope it makes sense!
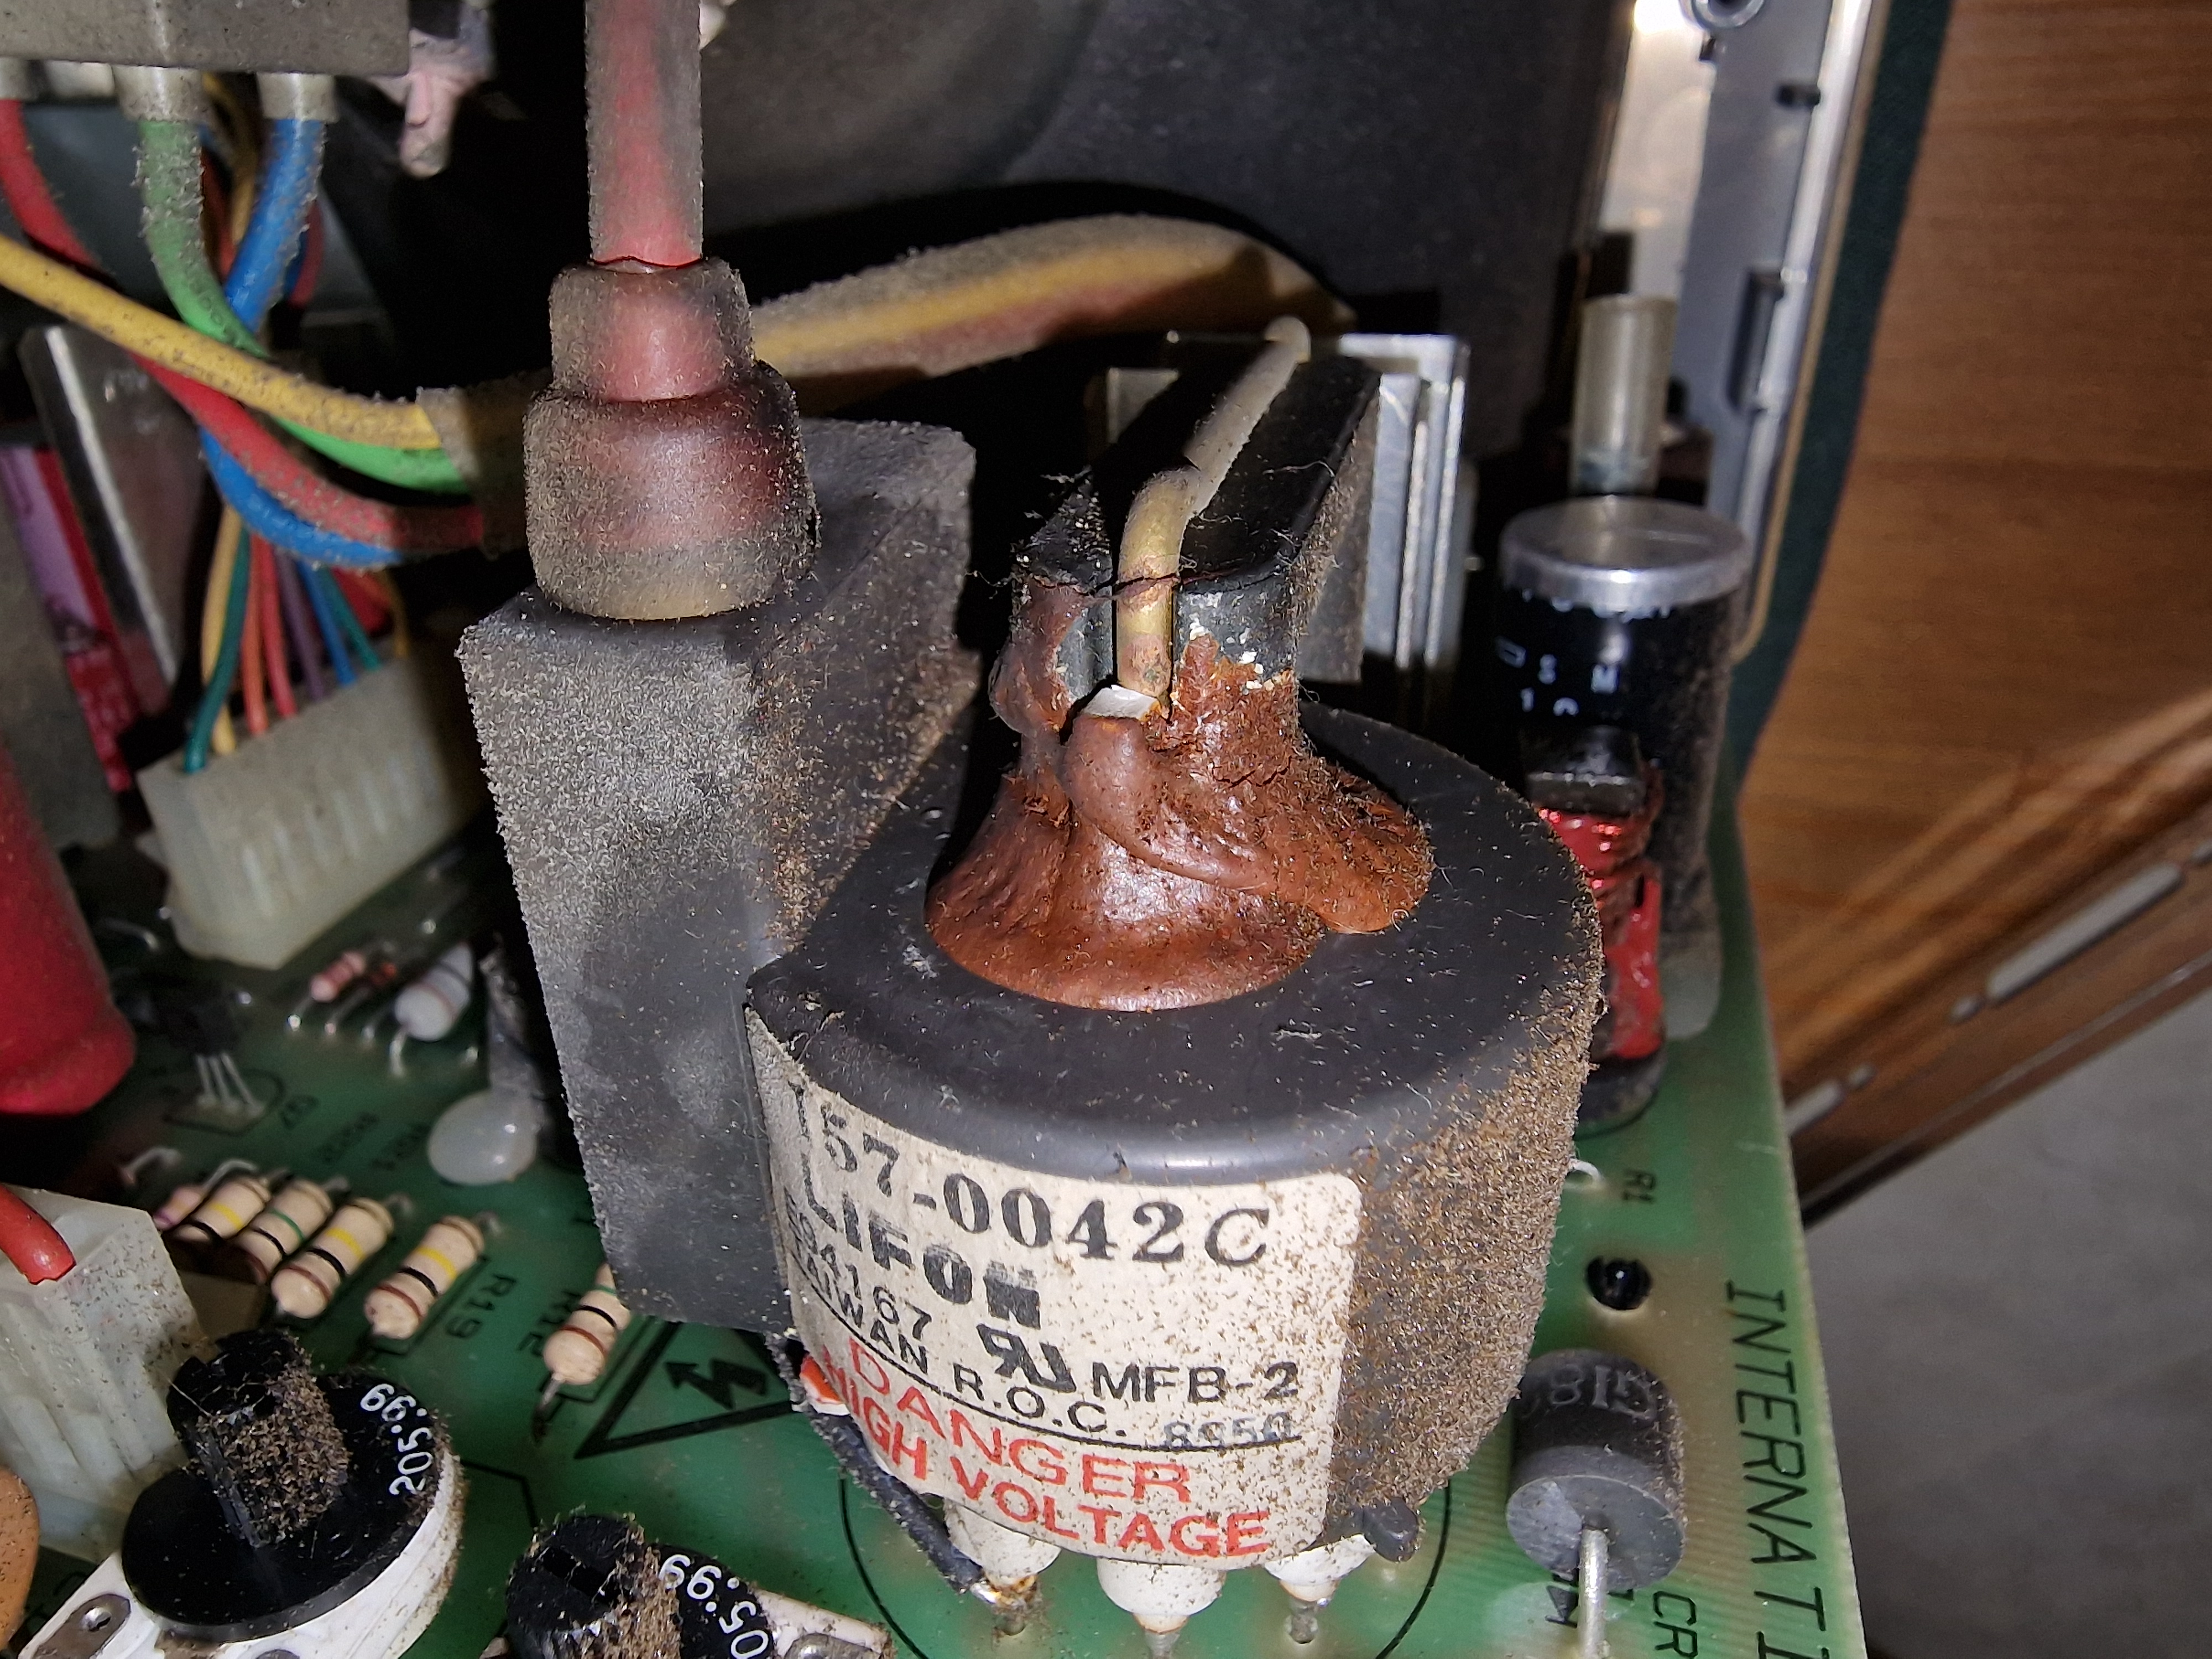
So, what does the analog board of the Mr. PootPoot actually do? First of all, it provides power to all the components. The motherboard needs power, the CRT need power, everything need power! This is all done just with voltage signals and transformer. Even to this day of writing power supplies are one of the last remaining analog components of computer systems. Since a few months, there are small steps to involve digital data, but this is far from widespread and still in the very early stages of development. Another important element on the analog board - if you'd ask me at least - is the speaker which is also fully analog. However, one of the essential functions of the analog board is controlling the CRT screen. It receives the analog video signal from the motherboard and transmits that to the CRT so it can project and image on the screen. This allows us to see System 6 in its fully shiny and monochrome glory. For that to go smoothly, the CRT needs to receive enough power and for that we need one of the scariest components on this board: the flyback transformer. This nifty little piece of equipment performs some form of black magic that can turn a cute 12V input into 12 to 15 kiloVolt. Kilo.. Volt.. That's literally the input times 1000. Did I say before that CRTs are lethal yet? I sincerly hope this drives that home even further and why it's so important to discharge the CRT before touching any of this stuff. Moving on; a quick look at the flyback already shows that's in a slightly concerning state. That brown-ish goop should be more a yellow/orange-ish colour, which means that the goopy epoxy-esque substance has corroded a bit and is now slightly conductive. It could be very mild and there could be nothing wrong, but at the same time it could be destructive. Furthermore, it's also showing some cracks which could leak some of the high voltage going through this thing which is - as you can probably imagine - less than ideal. That said, we heard no ringing noise when we first powered on the machine which is actually a good sign. Preferably, I'd replace this flyback transformer for a new one but they're very hard to get a hold on. If, somehow, you manage to get your hands on one, there's a hefty price to pay. There's more to this flyback than meets the eye. Care to learn more? Open me up!What's Next?
First of all, I want a round of applause for Mr. PootPoot. He has no leaking capacitors! * clap clap clap * That makes my life infinitely easier, as there is a much lower chance of damaged traces and circuitry on both boards. That makes the next steps for the project fairly simple. For both the analog and the motherboard, I'll have to figure out which capacitors I need to order for a full recap of both boards. However, you may have noticed that I did a sneaky and already did the research, as I've added the necessary components to this article's sidebar. Currently, Mr. PootPoot is chilling in his backpack (yes, it came with a backpack, how cool is that) with all the big components disconnected. It makes life a lot more hassle free to get the motherboard and analog board back out of the case again. Once the parts are in, it's time for the real work to start. This poor thing needs a good scrub, a real good scrub. To make that a little easier, I'll start with desoldering the old capacitors which gives me a little extra room on the boards. Also, why would I want to clean old capacitors, if I'm going to replace them anyway? Safes time and work, right. Both boards with get a nice spa in isopropyl alcohol and a whole lot of q-tips to make them all squeaky clean. All that's left to do, is soldering on the new capacitors. In the meantime, I intend to pay the Home Computer Museum a visit to see if they can help me out with the flyback transformer. They repair all kinds of old hardware, including Macintoshes, so they have a fair bit of experience with these components. Hopefully they have some handy tips for me; worst case is I go home empty handed and there's nothing wrong with that either.I hope you found the ramblings and gibberish in here interesting and useful in a way! Still, if you have any questions, feel free to ask them in the comments! Our writer really tries to write these things as accessible as possible, but it's sometimes difficult to gauge if she's gone too much in-depth or not.
Checking the State of the Machine
Progress GoalGetting a sense of the work that needs to be done to get the machine properly up and running. At this stage, this likely means:
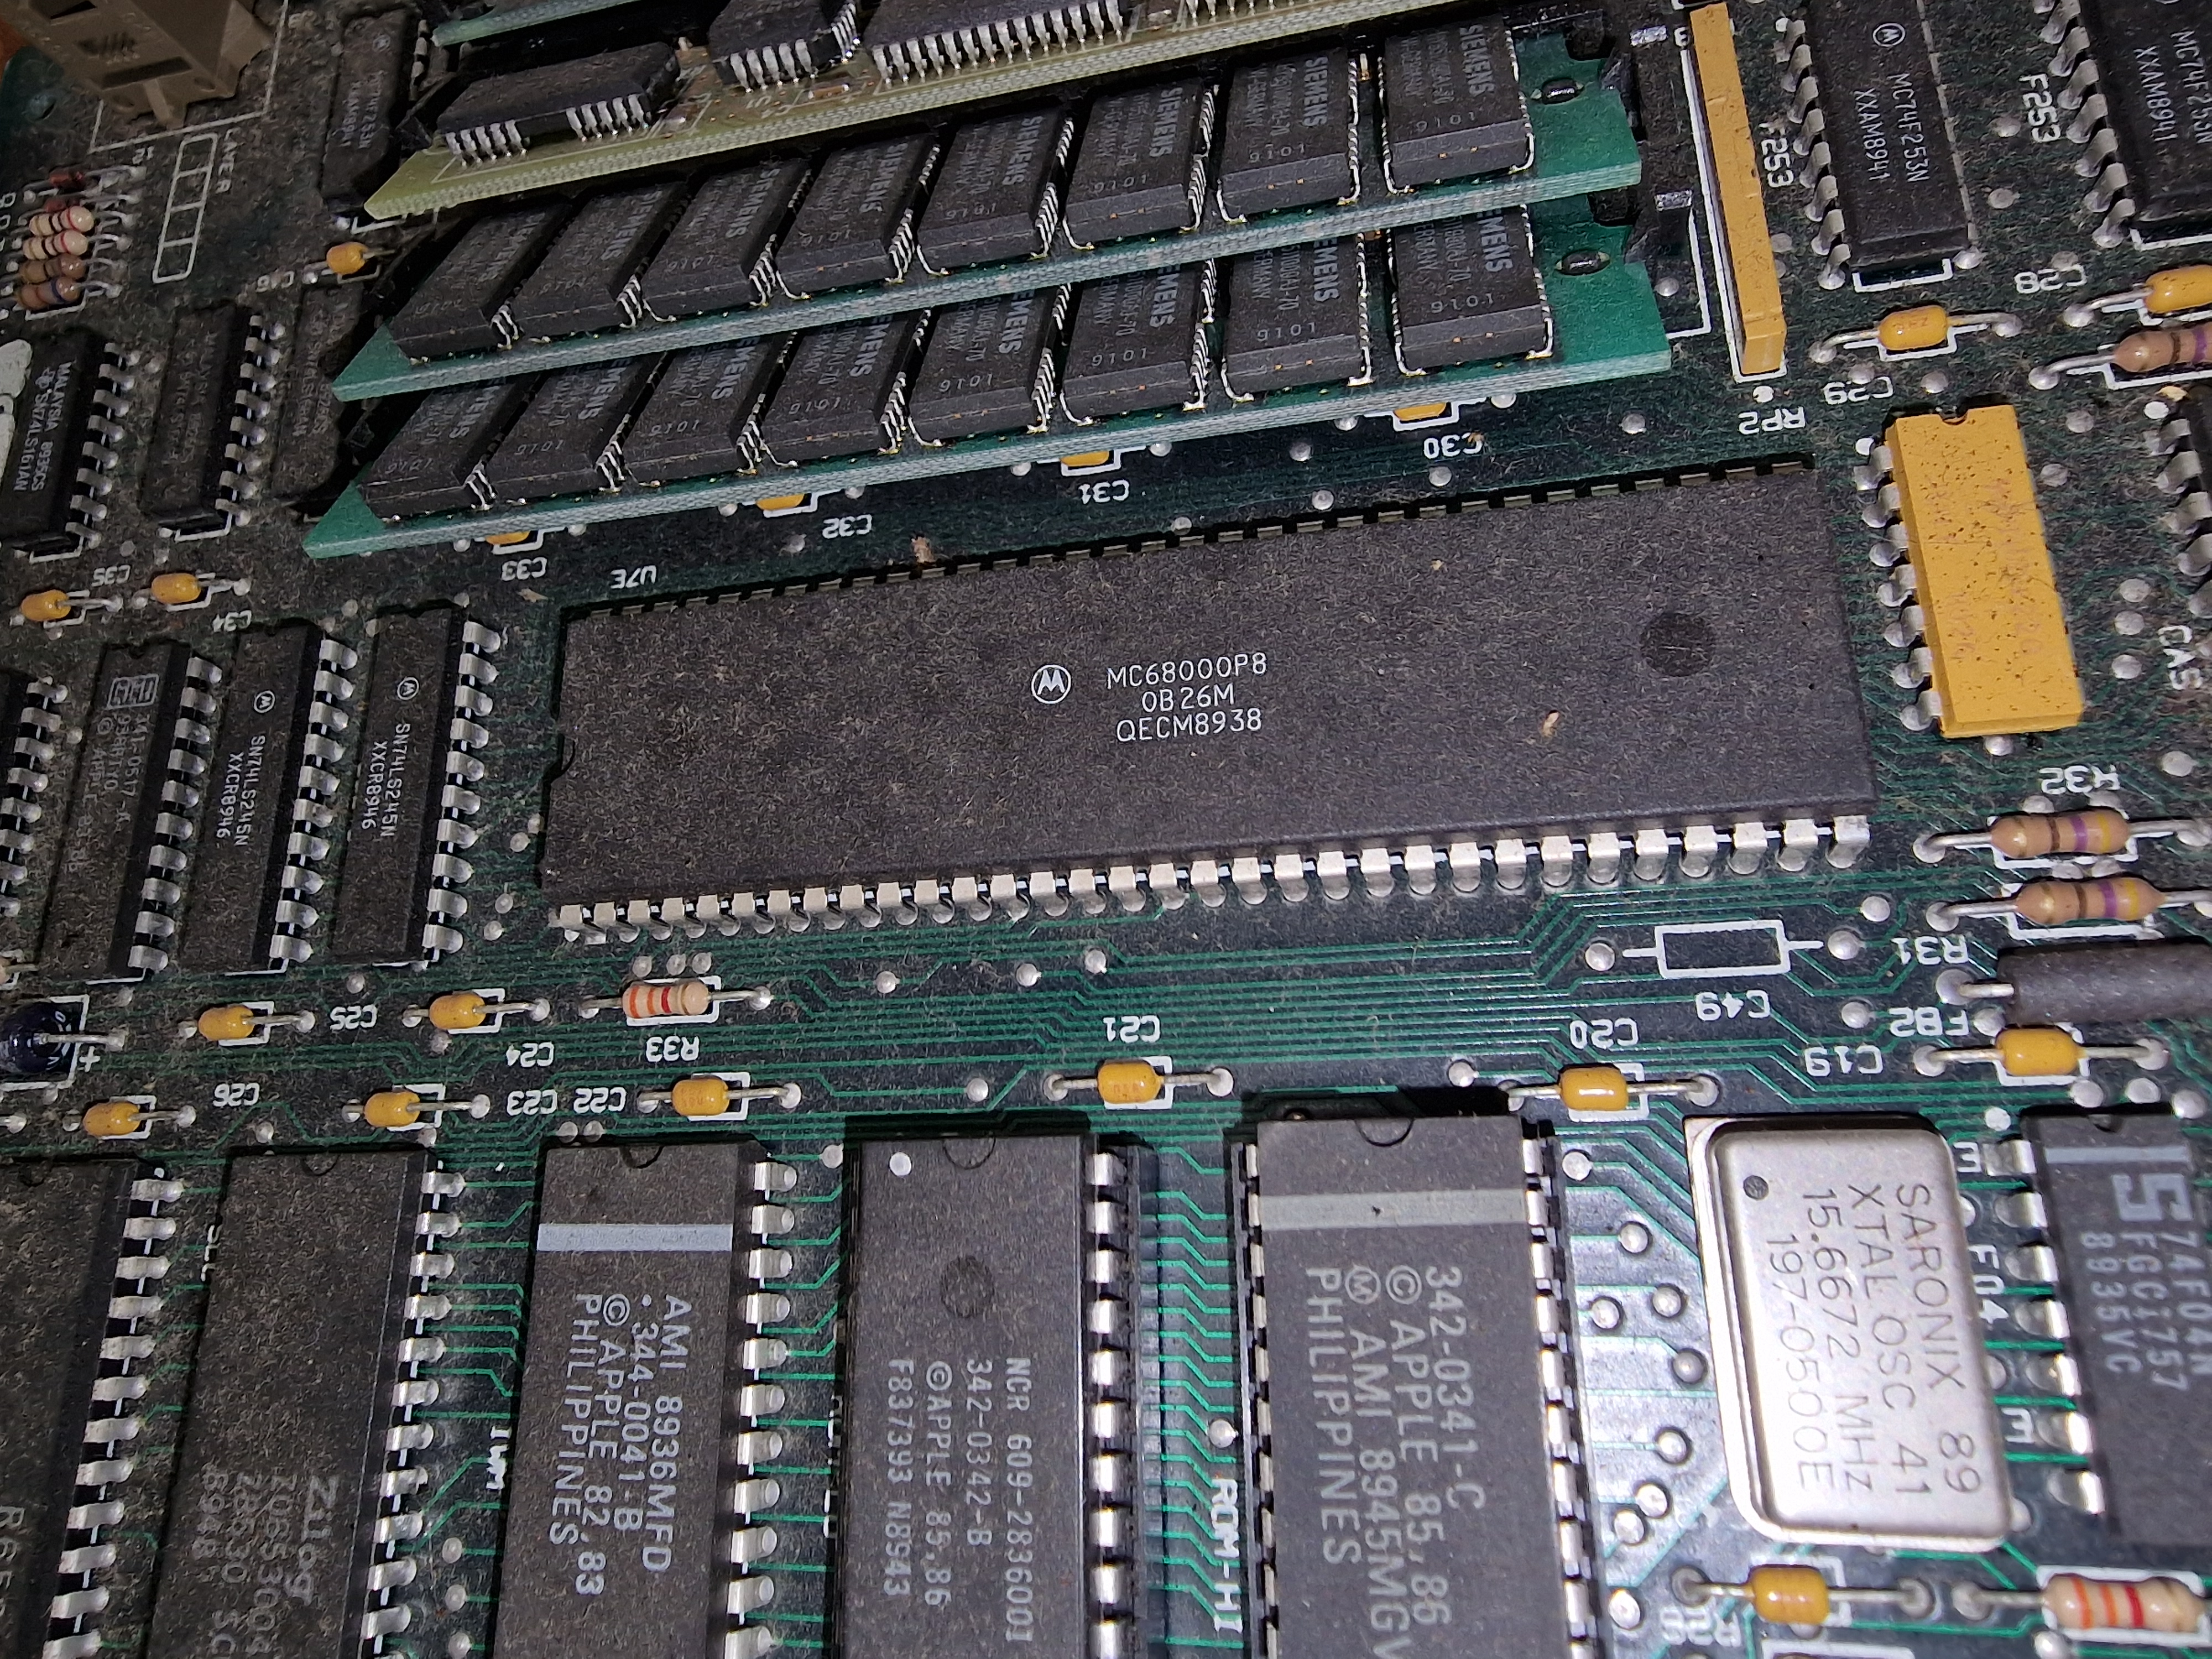
Motherboard Capacitors
| Position | Capacity & Voltage |
|---|---|
| C5 | 33μF 16V |
| C6 | 33μF 16V |
| C7 | 33μF 16V |
| C12 | 33μF 16V |
| C13 | 33μF 16V |
| C14 | 1μF 50V |
Some of these components might be hard to find, but here's an interesting thing about capacitors: as long as you have the right capacity (the µF value), you can replace them with capacitors that have a higher voltage (the V value)!
Analog Board Capacitors
Big thanks to the TinkerDifferent Forum for providing me with a ready-to-buy list of components that need replacing on the analog board!| Position | Capacity & Voltage |
|---|---|
| C1 | 3.9µF 35V |
| C2 | 4700µF 16V |
| C3 | 220µF 16V |
| C5 | 47µF 10V |
| C6 | 22µF 50V |
| C10 | 33µF 16V |
| C11 | 10µF 160V |
| C12 | 22µF 50V |
| C18 | 33µF 16V |
| C24 | 2200µF 16V |
| C27 | 2200µF 16V |
| C28 | 1000µF 16V |
| C30 | 2200µF 16V |
| C31 | 220µF 16V |
| C32 | 2200µF 16V |
| C33 | 4700pF 250V |
| C34 | 100µF 200V |
| C35 | 100µF 200V |
| C36 | 4700pF 250V |
| C37 | 0.47µF 250V |
| C38 | 100µF 200V |
| C39 | 100µF 200V |
| C42 | 470µF 10V |
| C45 | 470µF 10V |
Remove these ads. Join the Worldbuilders Guild





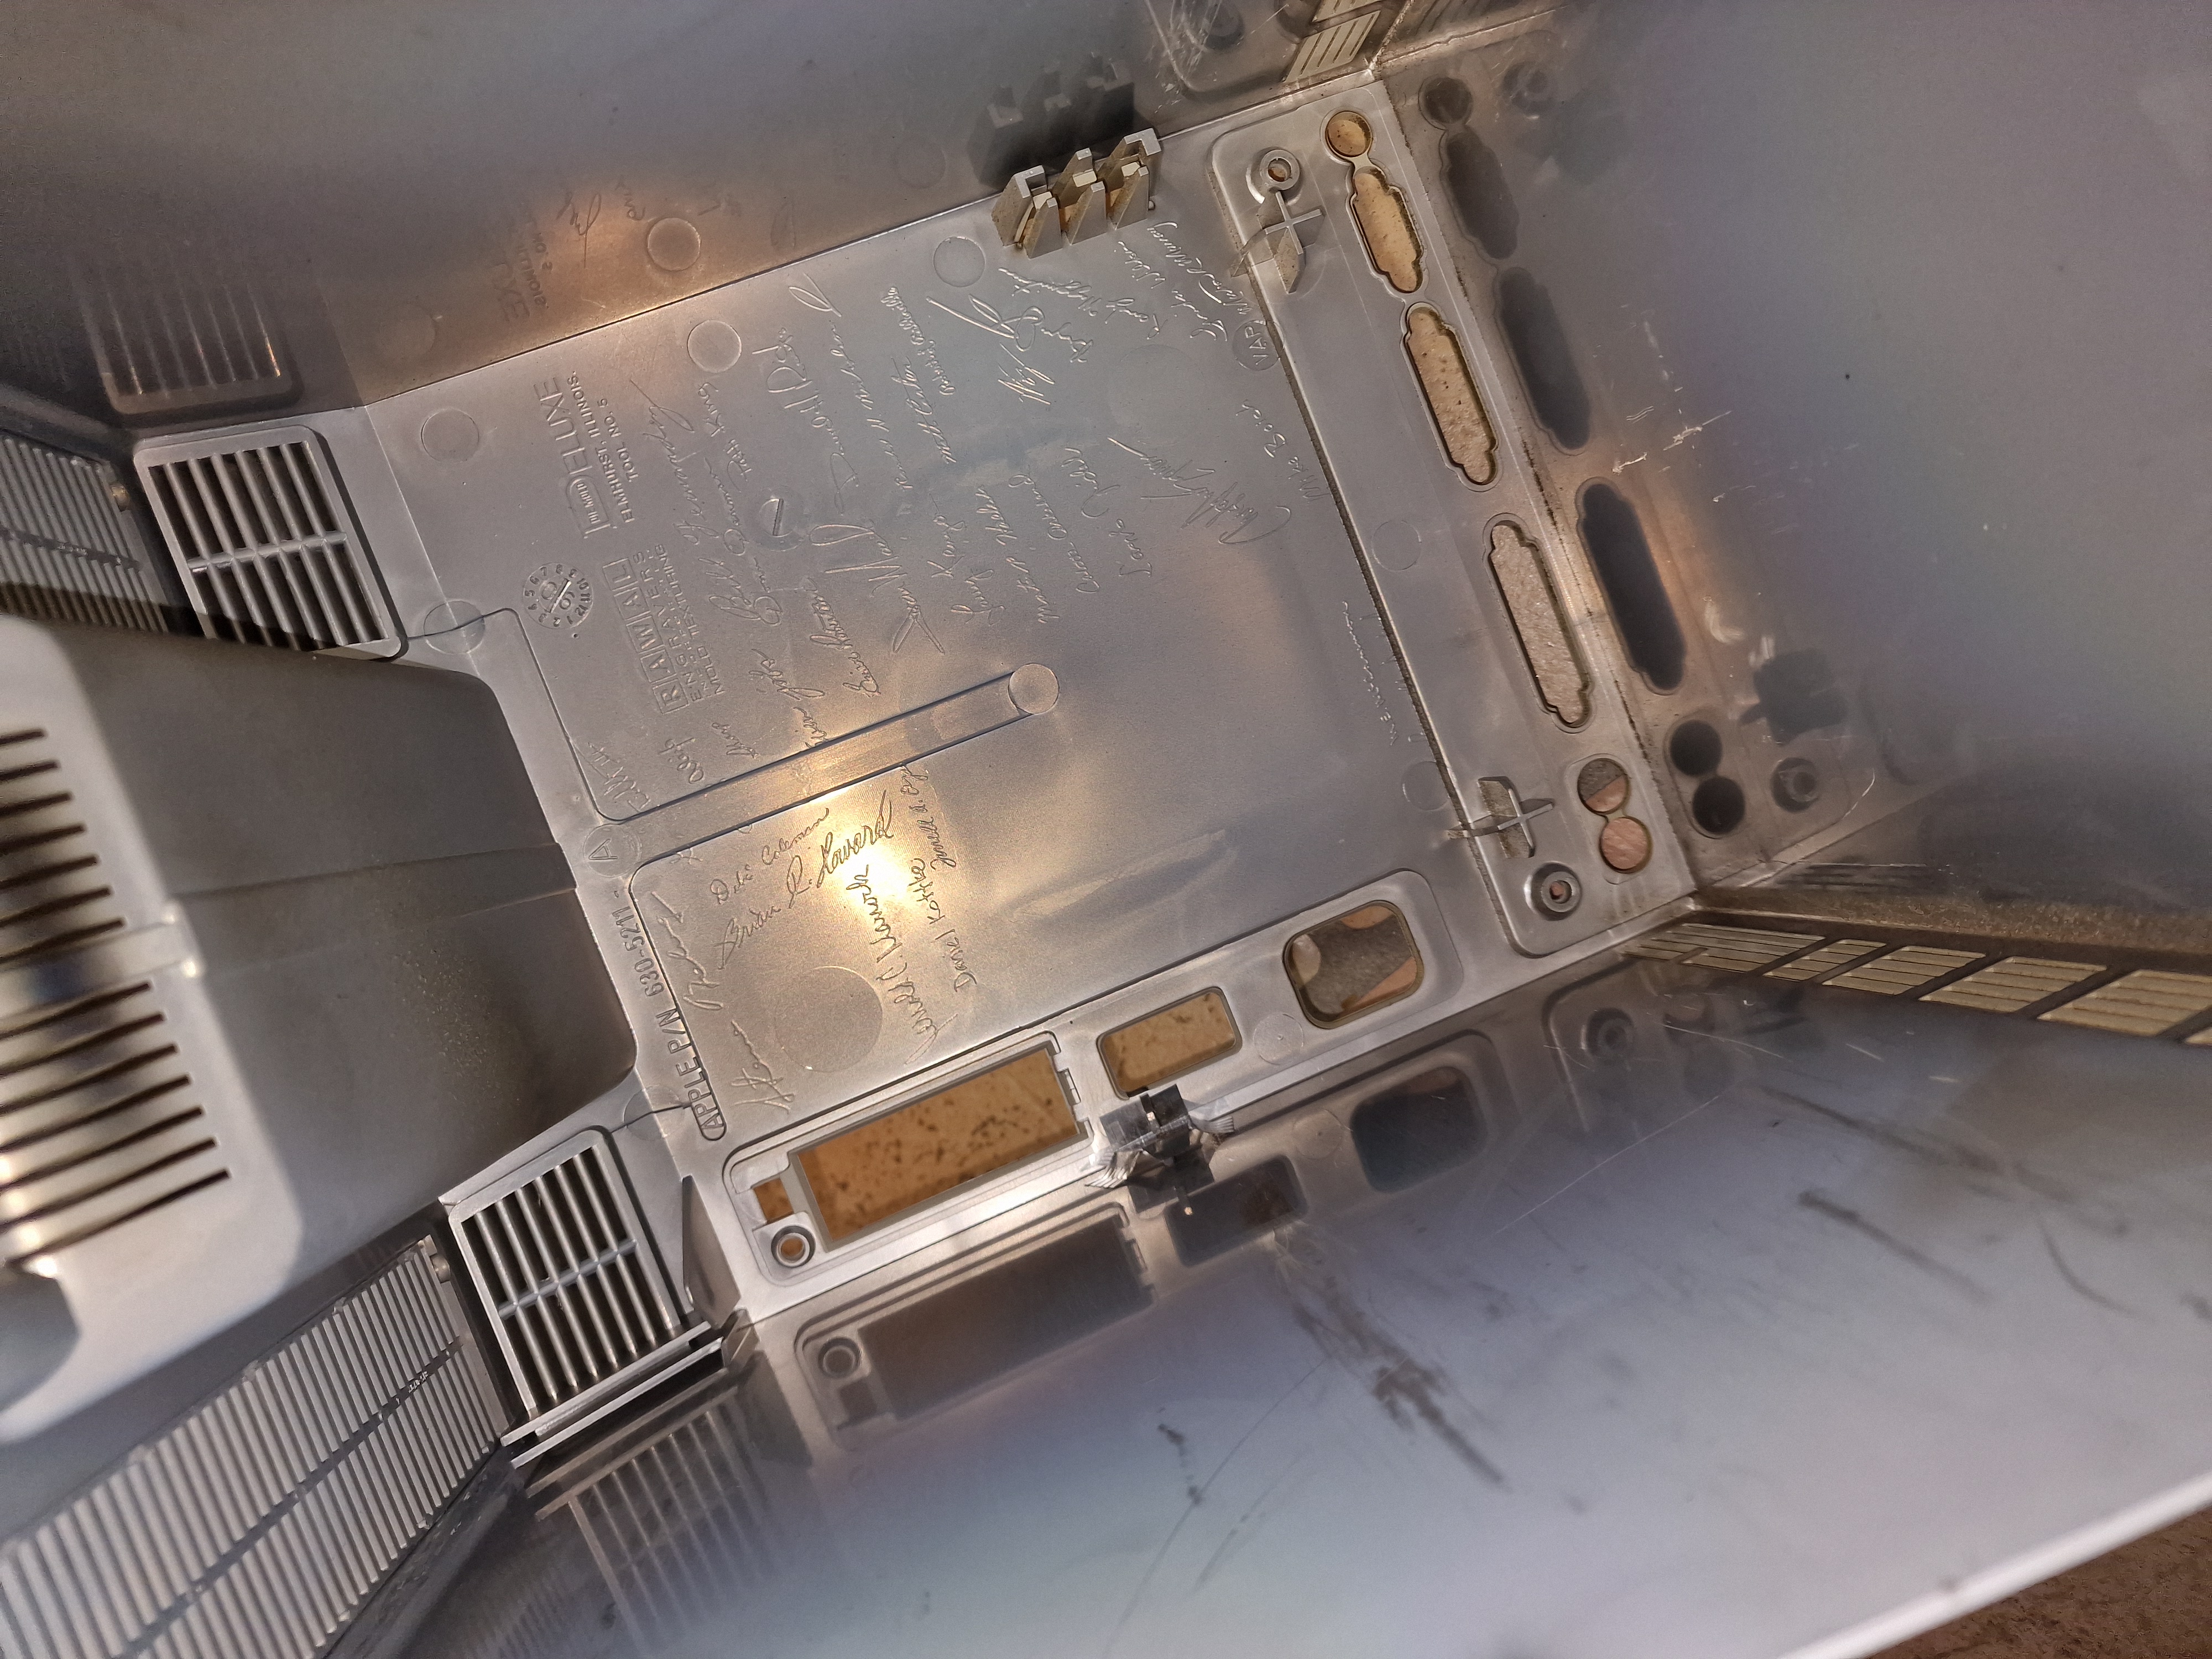



I would definitely immediately fry myself on the CRT. I love the signatures in the casing. That's so cool!
Explore Etrea | WorldEmber 2025