Tammeraut's Fate
General Summary
Firewatch Island rises out of the Wyvernwater in Cormyr. It was once the site of a Purple Dragon outpost north of Wheloon, intended to keep watch over that prison city. When a Sembian raiding force was sent to take the outpost and gain access to Wheloon, the garrison’s Northlander cleric called on Valkur for aid. The Sembian boats were sent to the bottom of the lake, where Netherese magic carried by the raiders wrought a terrible transformation on the drowned crew.3rd Uktar, 1493 DR A noble from Saltmarsh Hired them for 2,500 gp to go to Cormyr and find Morley Tobe a Dwarf who absconded with 8,000 gp that Davus Raal loaned him. They agreed to go, but also have the intention of Buying Rare Magic Items from the Suzail Royal Armory, and becoming Chartered Adventurers in Cormyr. After they receive their charter they travel to the village of Wheloon where they will Row out to the Island. 8 am Journeyng to Wheloon:
The road is little more than a gravel track hugging the coastline. The day is hot, and the air is thick with the scent and sound of the sea. Suddenly, you hear harsh cries and the sounds of a scuffle from up ahead. Rounding a curve, you see a woman kneeling next to a body, sobbing as she hunches protectively over the remains. Circling in the air a few feet above her, eight harpies screech and flail at each other.Worvin, Jaegus, and Narciara immediately see through the Harpy Matriarch Ruse: They attack! Veenaira Saved the party with Spiritual Guardian after everyone else was charmed and parlyzed. At the conclusion they check the corpse the Harpy was eating and Carcharius sees it dies of exhaustion. 830 am they arrive in Wheloon with a clear shot to the Island. 930 am they arrive

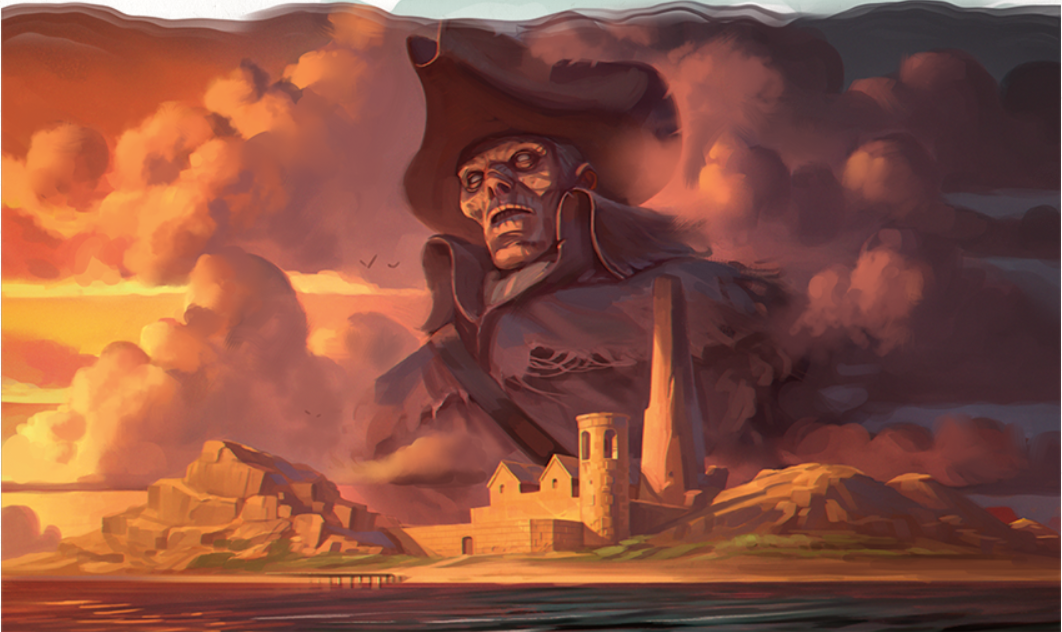
The sun makes the waves sparkle as Firewatch Island comes fully into view. Three barren hills are its most noticeable landmarks, rising above narrow, rocky beaches and small wiry shrubs on an otherwise sparse landscape. In between those high points, a small fortress and beacon tower can be seen. The building is made of stone and looks to have two floors. A bell tower rises an additional two stories above the rest of the building, and a low stone wall surrounds part of the complex.


1. A short wooden pier extends out into the water, connected by a path to an open archway in the fortress wall. The pier is in good shape, with wooden pilings raising it well above the high tide line of the rocky beach. The area is deserted, with no other boats or people in sight. The call of gulls, the shrieking of crows, and the crashing of the waves are the only sounds.Carcharius notices humanoid tracks leading from the waterline to the hermitage. He also notes distinct tracks returning to the waterline. They are attacked by Rasp, the famous Peryton of the Wyvernwater. They killed it on its first dive!
2. An archway in the fortress’s outer wall provides access to a large courtyard, now filled with vegetable gardens and a small orchard of stunted apple trees. Stairs to the east and west lead up to walkways overlooking the yard. To the southwest, the base of the bell tower is obscured by thick growths of vines, which also shroud the west stairs. A set of double doors stands along the front of the hermitage on the far side of the garden, and appears to be the only way inside.Duriing their search they are attacked by Assassin Vines. They rest for an hour after this! Then they finish exploring the courtyard. Upon investigation they see the double doors were recently broken open and have been jammed shut again.
3. A low, unfinished stone wall encloses a broad, sandy yard abutting an open vista of beach and sea. A small tower accessible by an external stair rises against the hermitage’s eastern wall. Several scrubby bushes stand to the north of a large oval pool at the center of the yard.Sea Hags tried to Ambush them with an Invisible Stalker. Worvin charmed the Hag. She provided detailed accounts of the assault on the island, and cackle in delight when speaking of the drowned ones. The hags have lived in the area for years, and they witnessed the first drowned one attack ten years before. They refer to the drowned ones as “walkers,” because the creatures plod along the floor of the bay, never swimming. They did not see the shipwreck during the storm, and know only the that the walkers came from the general direction of the Pit of Hatred. They eagerly give the characters directions to the rift, trading predictions of party members’ deaths all the while. Narciara stabs her when shes done and kills her. Carcharius sees some glimmering in the bottom of the Cistern. He swims down, and retrieves the treasure including a candleabra with the symbol of Valkur. Hour and a half has passed: They explore the Tower at 10
10. The heady scent of fermentation fills this dark, windowless hole. Its walls are rough masonry and its floor hard-packed earth. No ladder rises to the trapdoor in the ceiling. A table along the west wall holds a collection of copper tubing and vats. Next to it are several casks.Jaegus Discovers the cask are Assassin Berry Wine. He places some samples into bottles, and then goes to harvest Assassin Vine Berries. Though its difficult, Carcharius manages to break the ceiling Trap Door Open.
21. Where this small guard tower once abutted the east side of the fortress, part of the fortress wall has been knocked out to create an open doorway into the interior, with a rickety-looking balcony beyond. Arrow slits around the tower give a view of the area outside the fortress and the stairs that access the tower door. A wooden trapdoor is set into the floor, with a cloying odor rising from it. A ten-foot ladder lies next to the trapdoor.They carefully move through the hallway and look below into the Dining Room from the broken floor. Corfyn Puts the Ladder in the Bag of Holding.
20. The door to this chamber hangs open, with the detached head of a mace on the floor acting as a doorstop. The room is modestly furnished with a cot, a table, a chest, and a chair. An oddly shaped basin rests on the table, with a small piece of mirror hanging from the wall above it.They search the Room and move down the hall.
18. A partial wall divides this chamber into two sections. Two arrow slits are set into the west wall, and a small fireplace stands to the north. Several tables crowd the room, all covered with sheaves of paper, quills, ink pots, candles, and a few bound books. Numerous uncomfortable-looking stools stand around them. One of the ink pots has been overturned, resulting in a large black stain on one tabletop.The Giant Coral Snakes are fought off but Carcharius convinced a snake to leave them alone. They continue to the Junk Room of 16.
16. Bundles, barrels, and boxes are piled haphazardly across this tower room. A narrow path leads through the clutter to a staircase curving along the chamber’s inner wall. The stairs rise to an open trapdoor in the celling.They go down the stairs and find the door is locked. Narciara does not bother with it because there is probably a way in Downstairs. They continue back into the Hermitage.
Arrow slits set along the walls of this chamber make it a bit drafty. Murder holes open up in the center of the floor, overlooking the entryway into the level below. A fireplace is set into the south wall, with a dusty iron kettle close by. A trapdoor is set into the floor at either end of this chamber.Nothing. They proceed Downstairs.
7. Stairs rise to a railed balcony that covers two walls of this large, vaulted chamber. The balcony stands ten feet above the floor, with heavy crossbeams above reinforcing the twenty-foot-high, slate-tiled ceiling. Here and there, missing ceiling tiles have been covered over with thatch. A large, rusty metal tub and a broken wooden frame stand near the staircase. The floor shows spatters of blood and obvious signs of a recent scuffle.Carcharius investigates the blood for information on the Batltle. He determines that several people were recently slain here — including one who was drowned in the tub. The blood spatters on the floor are a day old at most. The character also notices a few more recent tracks, suggesting that at least one person survived the onslaught. It’s not clear in which direction the survivor fled. They find a bricked up doorway, probably leading to the lower Junk Room Tower.
12. This kitchen shows signs of recent use and is fairly clean. A kettle is suspended above a large fireplace, and a brick oven stands nearby. A cutting block bearing half a loaf of bread stands in the center of the room, next to an empty table. Shelves for holding dishes and utensils line the east wall.Corfyn Busts in the door to this room. Narciara picks the lock to the next room.
The walls of this room were once covered with row upon row of wooden shelving holding boxes of foodstuffs, but most of those supplies have been strewn across the floor. A few sausages still hang from hooks in the ceiling rafters, and an undisturbed bin of potatoes is scooted up against the rear face of the kitchen’s brick hearth.Worvin Tries to make sense of the map but much to his Chagrin Carcharius figures it out. The map shows Firewatch Island and the nearby coast, and has diagrams that convey the invaders’ original plans for using the island as a staging ground for a full-on assault against the mainland. This looks like it was a map from Sembian Raiders. Later Janore reveals to them that it was the plan of the raiders to attack Wheloon and then head further into the Mainland. The ship the Tammeraut sunk in the attack. Narciara finds a secret door. She finds a ladder that leads down.
A rickety ladder leads down from the larder into a musty subterranean chamber enclosed by rough masonry walls. Three trembling figures are huddled against the far wall, sharing the chamber with the dusty, deteriorated remains of an armored corpse. The body’s sightless eye sockets stare up blankly, and a small silver disk is clutched in one of its skeletal hands. A horizontal crevice between two blocks in the south wall glows with faint daylight, marking a narrow opening that leads outside the fortress.All three of the survivors are in shock from their recent ordeal, and they are desperate to escape the island. Unfortunately, Barret is in no condition to travel. Janore Stormswake can give the most detailed account of recent events, but she asks first if the characters have seen Aaron. She can recount how he slipped out from the bolt-hole to see if the fortress was safe, but never returned. Janore tells of having heard the bell ringing, then silence. The party heard that as well. Janore relates that she was reading in the library when a sudden premonition of danger came to her from her god, Valkur. She heard whispers in her mind that led her to this place, and her intuition told her that the skeleton found here was the remains of a fellow priest of Valkur. Acting quickly, she found Aaron in the kitchen and grabbed him just as he heard the dormitory door splintering. Morley and Barrett staggered into the larder soon after, wounded and in need of help. Janore says she dragged them inside and was about to seal the entrance when the larder door banged open: “I saw a corpse, dripping wet, shriveled and discolored as if by long immersion in the sea. It stalked into the room and began to search, so I sealed the door. Miraculously, it missed our hiding place, though it kept scrabbling at the floor as if it could sense us below. But then as the first glow of dawn showed at the cleft in the wall there, it suddenly fled.” Veenaira Uses Lesser Restoration to the cure the Disease of the very sick man and the Dwarf, who reveals to her he is Morley. By peering through the crevice to the south, the survivors witnessed the undead gathering the slain residents into nets. The monsters walked back into the sea, dragging several of the nets behind them. More than a dozen corpses remain to be salvaged from the grotto, waiting for the undead to return. At dawn, Aaron went up and out to search for survivors. Finding none, he remained outside to keep watch for passing ships. He planned on ringing the bell to draw their attention. In the meantime, he tried to fortify the place as well as he could. Having witnessed the undead at their work, the survivors are convinced they will be back — perhaps as early as tonight, after the sun sets. There is enough time for them to Rest before Sunset. They don't have time to prepare. They must rest and hope for the best with the assault. The Assault occurs and they rememmber they left the Tower Trap door open. The undead stop pounding on the door and go to that entrance once they figure it out. But this proved a boon as the Drowned ones stupidly attacked through a bottle neck. They stay awake the rest of the night but no more undead attack. 4th of Uktar, 1493 DR They explore the rest of the Tower.
22. A cast-iron potbelly stove squats to the north of the upper level of the fortress’s main tower, its stovepipe extending out the arrow slit to the north. The wooden frame and slats of an old bed are pushed up against a spiral staircase that rises to a trapdoor in the ceiling, leading to the open belfry above. Under an arrow slit looking toward the island’s western peak, a dusty desk is covered in debris and fresh bird droppings. Hinges hang on either side of each arrow slit, indicating that at one time they had shutters to keep out the elements. A section of the wall to the southwest has collapsed inward, opening up to the rocky slope of the island’s smaller hill ten feet below. The pile of rubble covers the smashed remains of a chair.They find a stash of Archais' Items and Worvin finds a backpack with his journal: Our worst fears are confirmed. Virgil has brought word of disaster. A war galley fully loaded with pirates approaches from the southwest. It flies the flag of Sembia and bears the name of the cursed ship Tammeraut. We must prepare what feeble defense we can muster. Woe to the folk of the coast at the approach of this bloody tide. • Miracle of miracles! Umberlee has answered the prayers of our illustrious chaplain. A furious storm blew in from the open sea and swept the war galley to its doom. But I believe that the vessel went down near the Pit of Hatred, an ill-starred undersea chasm two miles south of Firewatch Isle. This does not bode well, for the rift is said to be a passage to a source of interminable evil that was long ago sealed away. If the wreckage should rupture the wards, terrible darkness might be unleashed. I must mount an expedition to the sunken hulk and make sure all is well. • A fell wind blows this evening. I fear the wards on the rift have been broken. I must set out first thing in the morning to inspect the wreckage. Jaegus and Veenaira connect the journal’s reference to “raiders” to the pirate captain Syrgaul, a notorious sorcerer who forged an unholy pact with the demon lord Orcus. He and his crew never left survivors of their attacks, and his ship, Tammeraut, was the scourge of the Sea of Fallen Stars. They move up to the Belfry.
This open belfry offers a breathtaking view of the open sea and the distant coast. Four stone corner posts support the belfry’s conical slate roof where it peaks twenty feet above, with a crenellated battlement running between them. A human body is sprawled in a depression at the center of the stone floor, its torso torn open and its heart missing. The base of what was once a metal framework surrounds the depression. Above the body, a large bronze bell engraved with symbols of peace and serenity hangs from a crossbeam, with a pull rope dangling from the rigging above. Across the floor next to the body, a message is scrawled in chalk: “BEWARE THE SEA KILLERS.”Worvin figures out the big tub in the entry hall (7) used to be here. Or at least he suspects. The man must be the missing hermit Aaron. He must of rang the bell and the peryton attacked. Just as they are about to descend the stairs:
The sultry day is silent except for the sounds of the sea. A lone bird circles in lazy loops in the sky overhead. Eventually it descends and alights on a nearby rock. It’s a gull, and an old one at that, with a chipped beak and patches missing from its thinning feathers. It waddles closer, gazing intelligently at you with weak, rheumy eyes.It approaches Carcharius and he speaks with the gull.
- Virgil survived the slaughter of the garrison ten years before and has lived on the island ever since, nesting in the wizard’s tower room. It has avoided the hermitage residents and was largely ignored by them.
- It does not know the specifics about Tammeraut’s crew, but it does know that the drowned ones are victims of that fateful sinking.
- Virgil knows the location of the Tammeraut and can guide the characters there. Based on the attack tonight, the gull correctly deduces that Tammeraut’s crew is active once more and must be stopped.
- Several years ago, a fearsome pirate named Syrgaul sailed the sea aboard his war galley, Tammeraut. Syrgaul and his crew showed no mercy to those who crossed their path, killing the crews of those ships that fell prey to him. Syrgaul was a mighty sorcerer, and his crew was bloodthirsty and skilled in both sailing and killing. Worse still, Syrgaul claimed allegiance to Orcus, the demon lord of the undead. Orcus did indeed seem to favor Syrgaul, who often benefited from strong winds in his sails and swirling currents that prevented his prey from escaping. In return, the pirate captain made sacrifices to the demon lord. Syrgaul eventually met his end just over ten years ago. As he and his crew approached a naval post called Firewatch Island to plunder it, a priest garrisoned at the outpost implored the sea god, Umberlee, for mercy. Whether because of luck or because the cleric’s prayers were answered, a sudden storm swept through the area, capsizing Tammeraut and sending the ship to the bottom of the sea.
- Virgil also knows the location of the Pit of Hatred, having accompanied Archais there several times while the wizard was alive. If all else fails, he can guide the characters to the proper location — flying ahead and circling the site. The Pit of Hatred is two miles south of Firewatch Island and can be rowed or sailed to in about half an hour.

The rotting skeleton of a war galley’s stern looms up from the ocean bottom ahead. The sinking ship broke in half during its descent, its bow section gone missing but its stern plunged backward into the seafloor like a spike. The sandy bed around the wreckage is scattered with partially buried bones and debris. As you approach the wreck, the water becomes unnaturally cold, and the schools of fish that swarmed in the waters above are conspicuously absent.There is an Unhallow around the wreck making many of the party Vulnerable to Necrotic Damage, and causing them damage from cold.
Carcharius pulls a stone slab out from the sand. Worvin knows its a product of magic, a seal of some kind, made from the Stoneshape spell.
The runes are in Elvish. They communicate a warning to stay away from the sealed rift and the horror that lies below.
The interior of the sunken ship is a ruin. The decks have all but collapsed, creating a tangled maze where ooze and muck cling to sundered timbers and beams. An eerie, many-colored light pulses from the depths of the hull.They defeat a group of Drowned Ones and heal after
A pulsating light composed of unnatural colors permeates this underwater cavern. The stern of the ship has broken through the cavern’s fifteen-foot-high ceiling near the center of the area. The nauseating light reveals a hideous array of piled bones, many of which clearly once belonged to humanoids — far more bones than could be accounted for by the crew of a single sunken ship. A shallow alcove opens up to the north, with a rotting sea chest set before it, leaning against the rough stone wall. Within the alcove, a funnel-shaped hollow in the cavern floor terminates at a narrow hole in the bedrock below. The pulsing light emanates from this hole.They fight Syrgaul. They defeat him. Now they must seal the rift. They do it with the Soverign Glue that was found. They plug it with the old Elven Stones. After this they swim back to the Folding Boat. Return with Morley to Saltmarsh
6th of Hammer, 1493 DR
Rewards Granted
XP:3400+7200+2800+3200+4400+500+2700+1100+2100+3100+5450
- cp
- sp
- ep
- gp
- pp
- religious icon set with fourteen small diamonds (100 gp each)
Unidentified Magic Items:
- twelve +2 bolts
Missions/Quests Completed
Killed Rast! 500 gp Bounty
Sealed the Rift: Cormyr Charter Award: 3,000 gp
Bring Morley back to Saltmarsh: 2,000 gp
Related Reports
They spend 1 week Downtime in Cormyr. Then Travel back to Saltmarsh using a Luxury Coach. 6 cp mile. Comfotable Life Style.
Report Date
12 Aug 2024
Comments